Guide
Clothing product photography: flat lay, mannequin or model?
Clothing photography for a small shop comes down to four methods. What each one shows, what it costs, and how to shoot it with a phone and no studio.

 By Elena Varga
 · Reviewed by Sofia Moretti |Fact-checked|11 min read
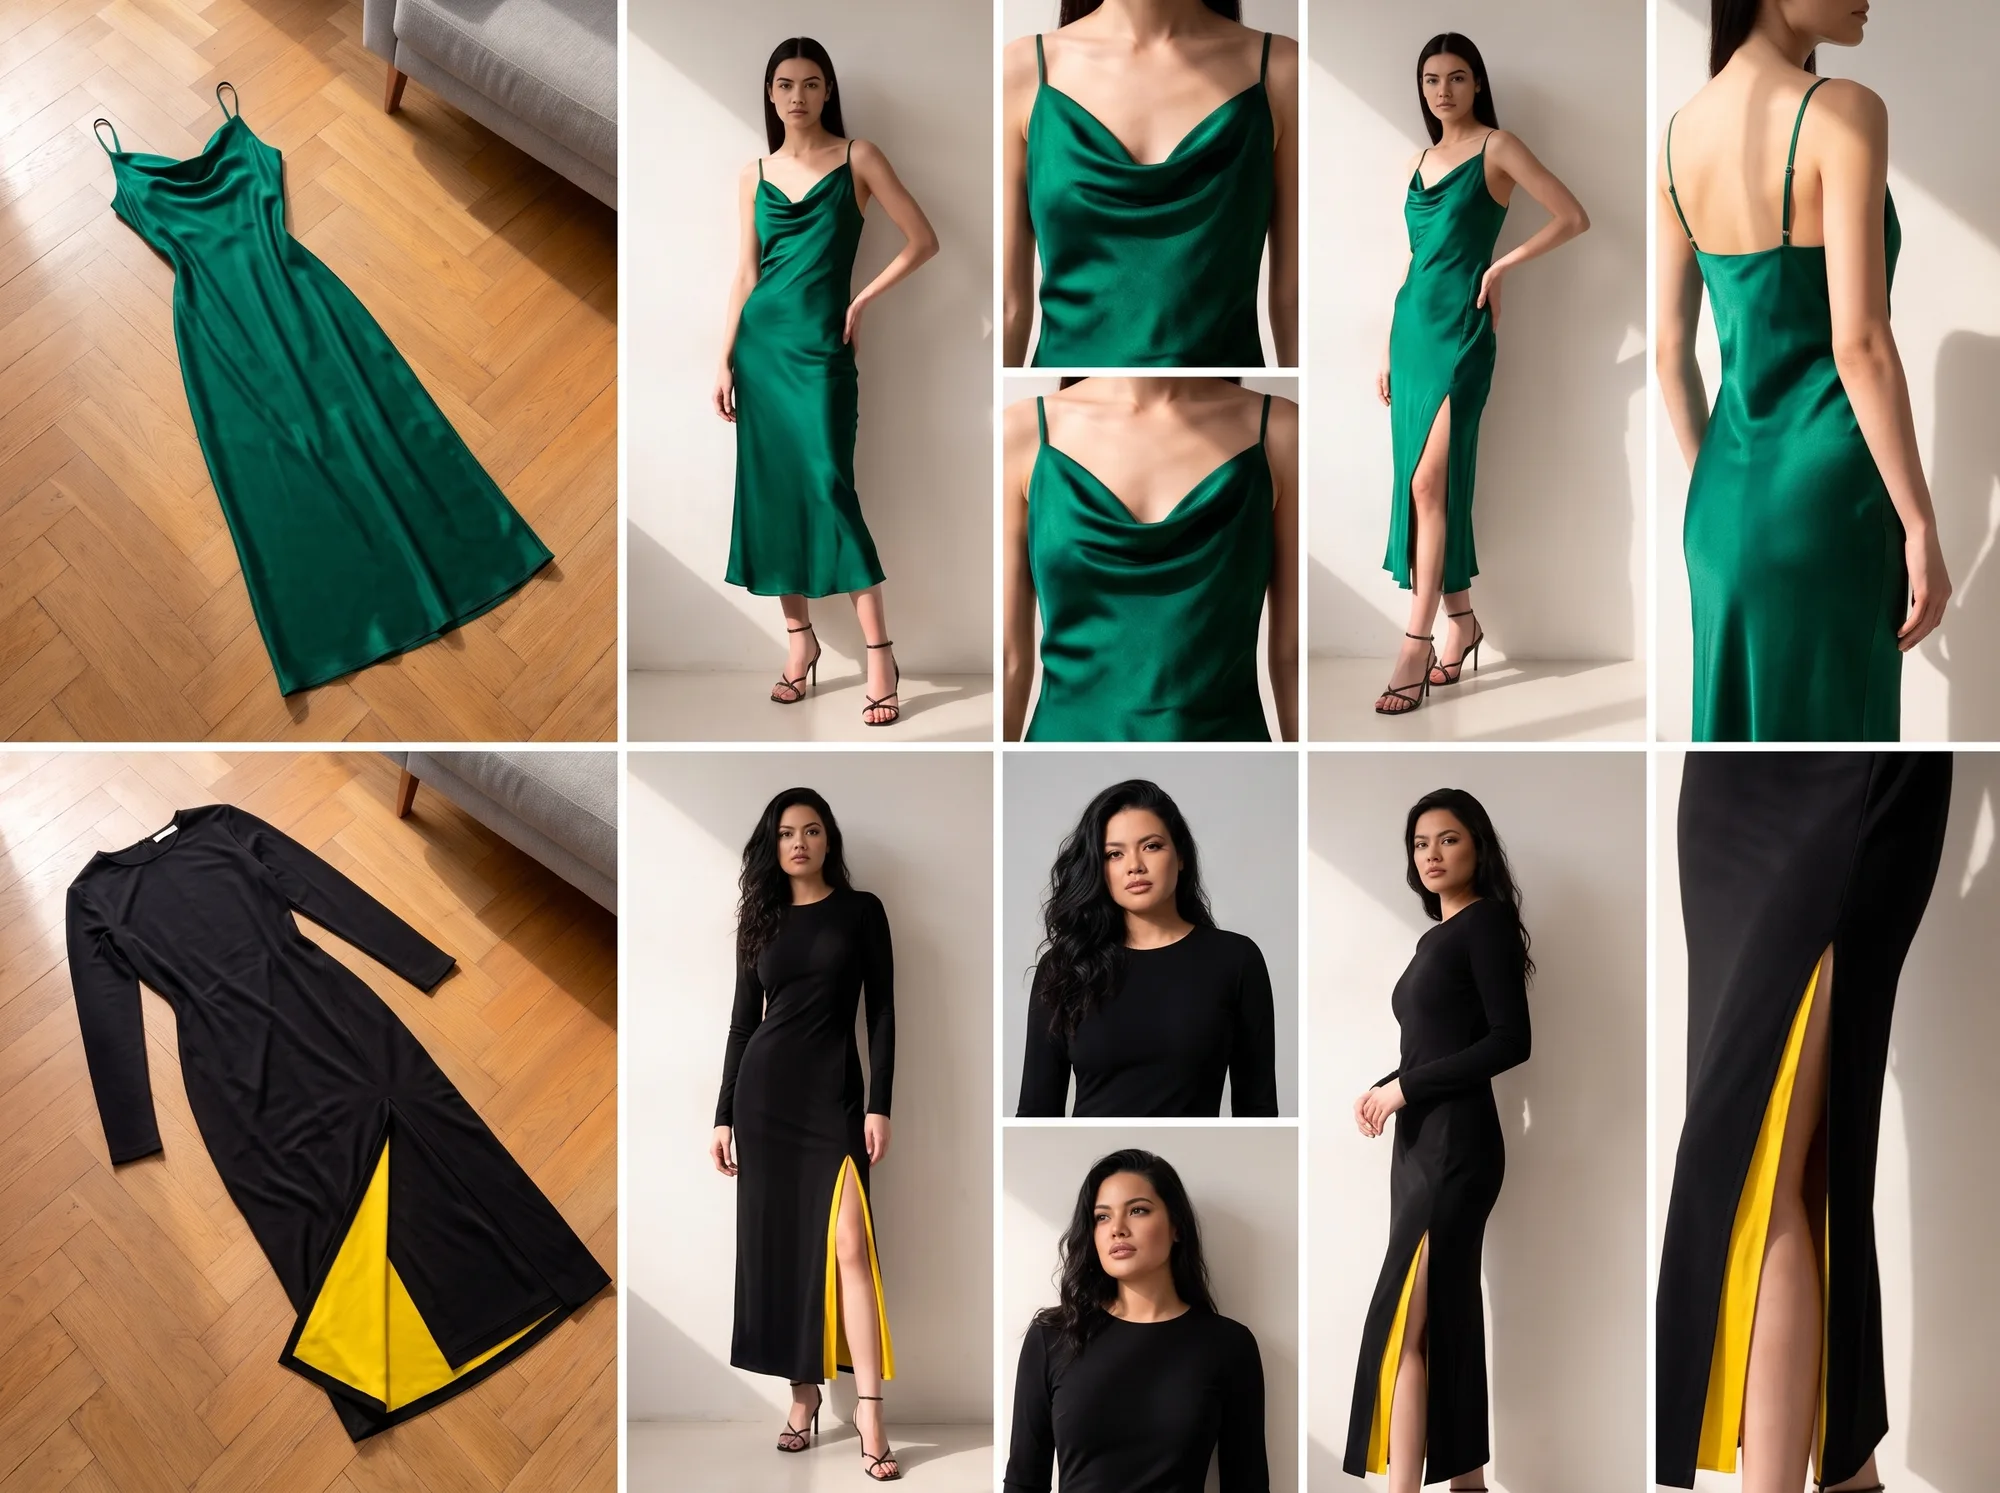
Key takeaways
- 1A flat lay is the cheapest clothing photo and the best for detail, but it can’t show fit.
- 2A ghost mannequin gives a clean catalogue look. An on-model photo shows fit, and Google asks for clothing shown worn by people.
- 3No models? AI can put your flat lay, hanger or mannequin photo on a model. Check prints, logos and sheer fabric at full size before you publish.
10 free photos, no card. Photos as low as $0.25 each.
On this page+
Flat lay, mannequin or model: which should you use?
The short answer
Use a flat lay for a quick, cheap photo that shows colour and detail. Use a ghost mannequin for a clean catalogue where every piece has the same worn shape. Use an on-model photo to show fit, which neither of the others can. No models? AI can put the garment from your flat lay on one.
Apparel product photography has a problem other products don’t: the thing you sell changes shape when someone wears it. A dress on the floor, on a dress form and on a person makes three different pictures. So a good listing uses more than one, and the real question is which photo does which job, and what it costs you.
What are the four ways to photograph clothes?
The short answer
Flat lay, mannequin (often edited into a ghost mannequin), a real model shoot, and an AI model made from your own photo. They differ in what they show, what they cost, and how much of your own time they take.
| Compared | Flat lay | Ghost mannequin | Real model shoot | AI model from your photo |
|---|---|---|---|---|
| Shows well | Colour, print and small details | The worn shape, with no body or hanger in view | Fit, drape and mood on a real person | Fit on a person, from your own photo |
| Falls short | Fit and drape; every crease shows | No sense of fit; needs a mannequin and skilled editing | Cost and coordination; a reshoot means paying again | Fine print, logos, sheer fabric, sequins and exact colour need a close check |
| Your time | Steaming, shooting and editing each piece | Two shots per garment, then compositing | 2 to 4 weeks from booking to edited files | An afternoon for 60 photos, including retries |
| Typical cost | Almost nothing in cash | A mannequin, plus retouching: $5 to $20 an image basic, $50 to $150 extensive (Squareshot) | $1,180 to $6,400 for one day of photographer, model and studio (Shopify, soona, Peerspace) | From $9.99/month, as low as $0.25 per photo |
| Best for | Resale one-offs, details, and the input photo for AI | A clean, matching catalogue | Campaigns, lookbooks, fabrics AI gets wrong | Product pages when you can’t book models |
Where the figures come from. Public rates quoted, with links, in our fashion photoshoot cost guide: photographer day rates from Shopify, model rates from soona, studio hire from Peerspace, retouching from Squareshot. Tryly’s $9.99/month is the Starter plan billed annually.
Read it as trade-offs, not a ranking. The cheap methods can’t show fit, the real shoot costs the most, and AI’s weak spots are specific enough to test before you pay.
How do you shoot a flat lay?
The short answer
Steam the garment, lay it on a plain background in soft daylight, and shoot straight down from directly above with the whole piece in frame. Then shoot every item the same way, at the same height and crop, so your listings match.
- Steam or iron it first. A flat lay shows every crease. Lint-roll dark fabrics and remove hang tags.
- Use soft daylight. Set up by a big window, out of direct sun, with the ceiling lights off.
- Pick a plain background that contrasts. White or light grey board, paper or a clean sheet.
- Shoot from directly overhead. Turn on your phone’s grid and keep the phone parallel to the floor; a tilted phone can make the hem look wider than the shoulders.
- Style with care. Button and zip it as you sell it, smooth the sleeves out, and turn prints and labels to the camera. Skip the props.
- Keep the same crop. Tape marks for the phone and the garment keep every product the same size in the frame. While you’re set up, shoot close-ups of the fabric, label and print.
A clean flat lay pays twice: it sells on its own, and it is the best input for a ghost mannequin or on-model photo later. Shoot it sharp, roughly 1,024 pixels or more on the shortest edge, because detail the photo never captured can’t be added later.
What if the garment won’t lie flat?
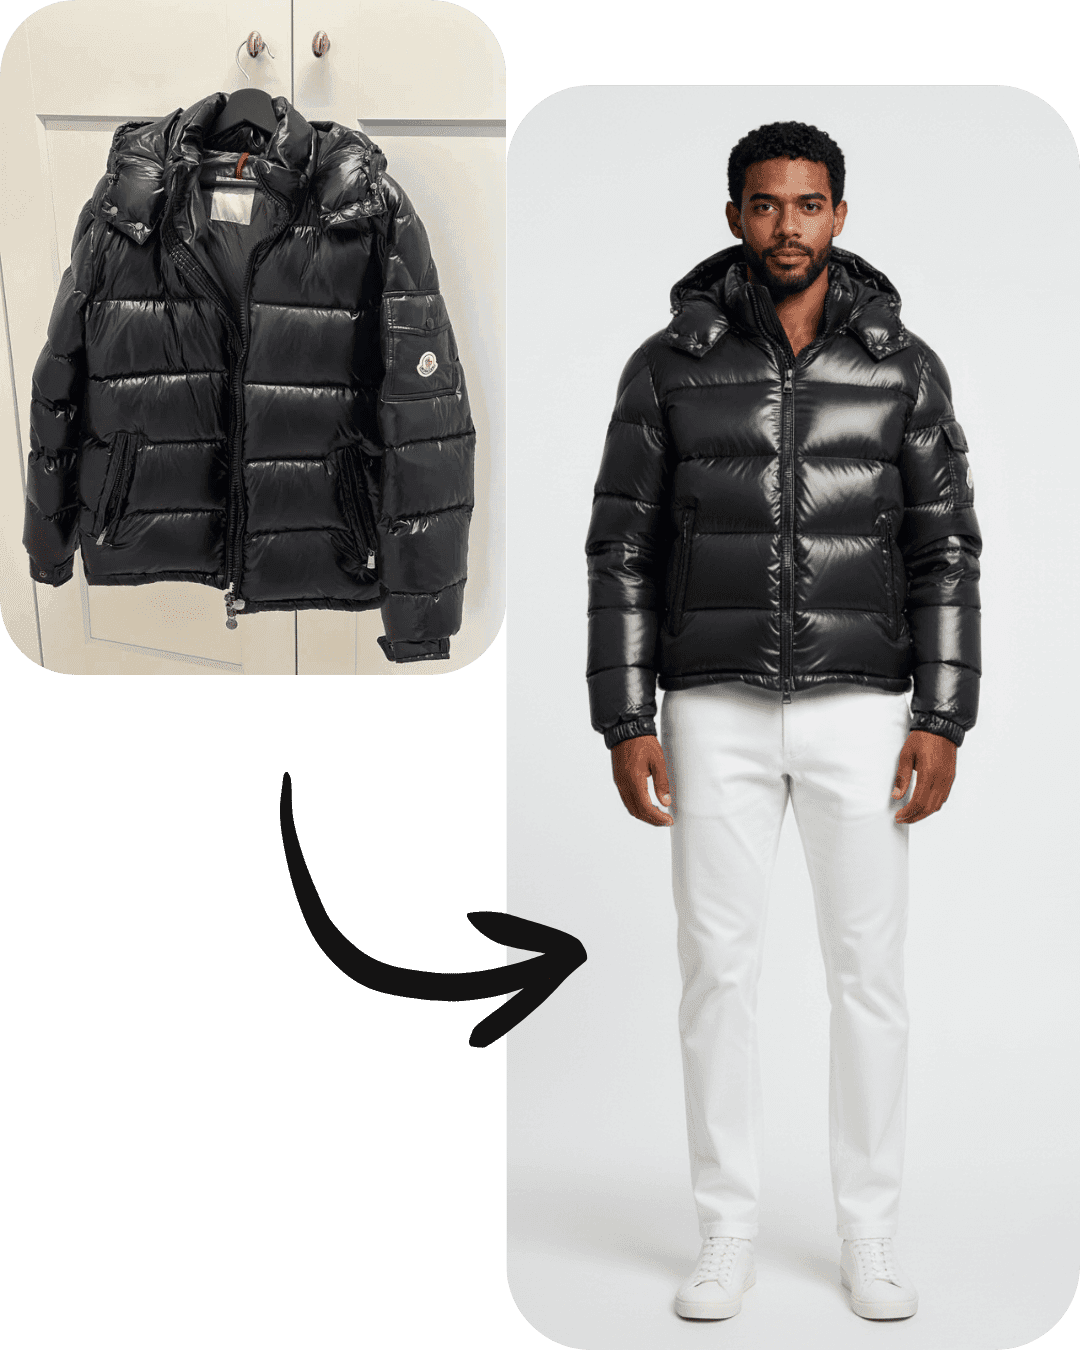
Puffers, coats and tailored jackets often look better on a slim hanger against a plain door or wall. Shoot straight on, with the whole piece in frame. The catch: a garment hanging from one point looks narrower and flatter than it does on a body.
How do you shoot on a mannequin or as a ghost mannequin?
The short answer
Dress a mannequin close to your sample size, square it to the camera and shoot from the garment’s mid-height. A classic ghost mannequin adds a second shot inside the collar, then a retoucher removes the mannequin. Tryly can make the ghost shot from a flat or hanger photo, with no mannequin at all.
A mannequin gives a garment a body’s shape without booking a person. Pin the fabric at the back so the front sits smoothly, keep the background plain, and shoot the front, back and one side. The weak point is the mannequin itself: in a cluttered room it can make a listing look home-made.
The classic ghost mannequin method
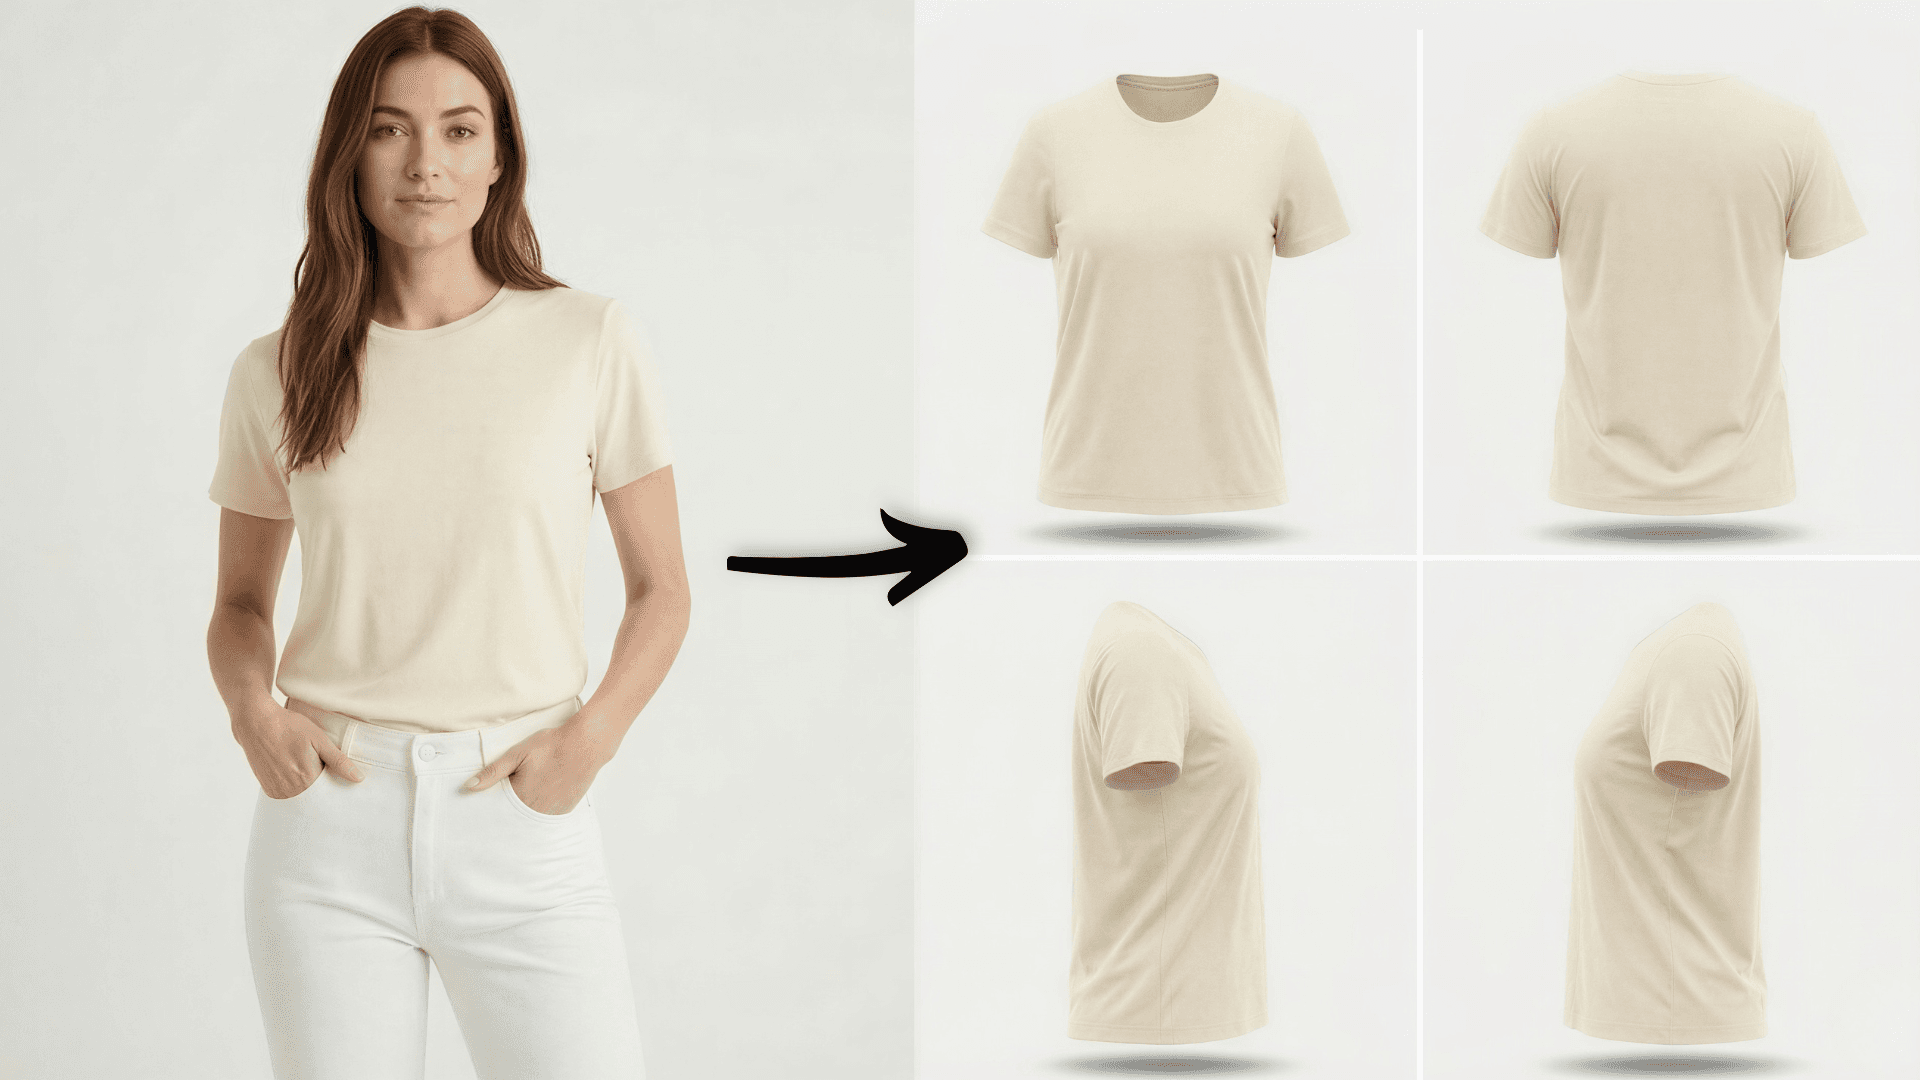
A ghost mannequin photo, also called an invisible mannequin or hollow man shot, shows the garment holding a body’s shape with nobody inside. Classically it is a compositing job: shoot the garment on the mannequin, shoot the inside back of the collar, then cut the mannequin out and stitch the collar in. That neck joint is where the retoucher’s time goes, and where a rushed job shows.
A ghost mannequin without the mannequin
Tryly builds the worn shape from a photo of the garment on its own: flat, on a hanger, on a dress form or worn by a person. Say whether it is a top, a bottom or a full outfit, and pick up to eight angles; each angle is one photo and one credit, at 2K. There is no neck joint to patch, but check the details at full size. See ghost mannequin photography.
What does an on-model shoot involve?
The short answer
A photographer, a model and a studio, often with a stylist, hair and makeup and a retoucher. On public rates, one day of photographer, model and studio costs roughly $1,180 to $6,400. Add a stylist, hair and makeup and basic retouching of 60 images, and it is $2,230 to $9,900.
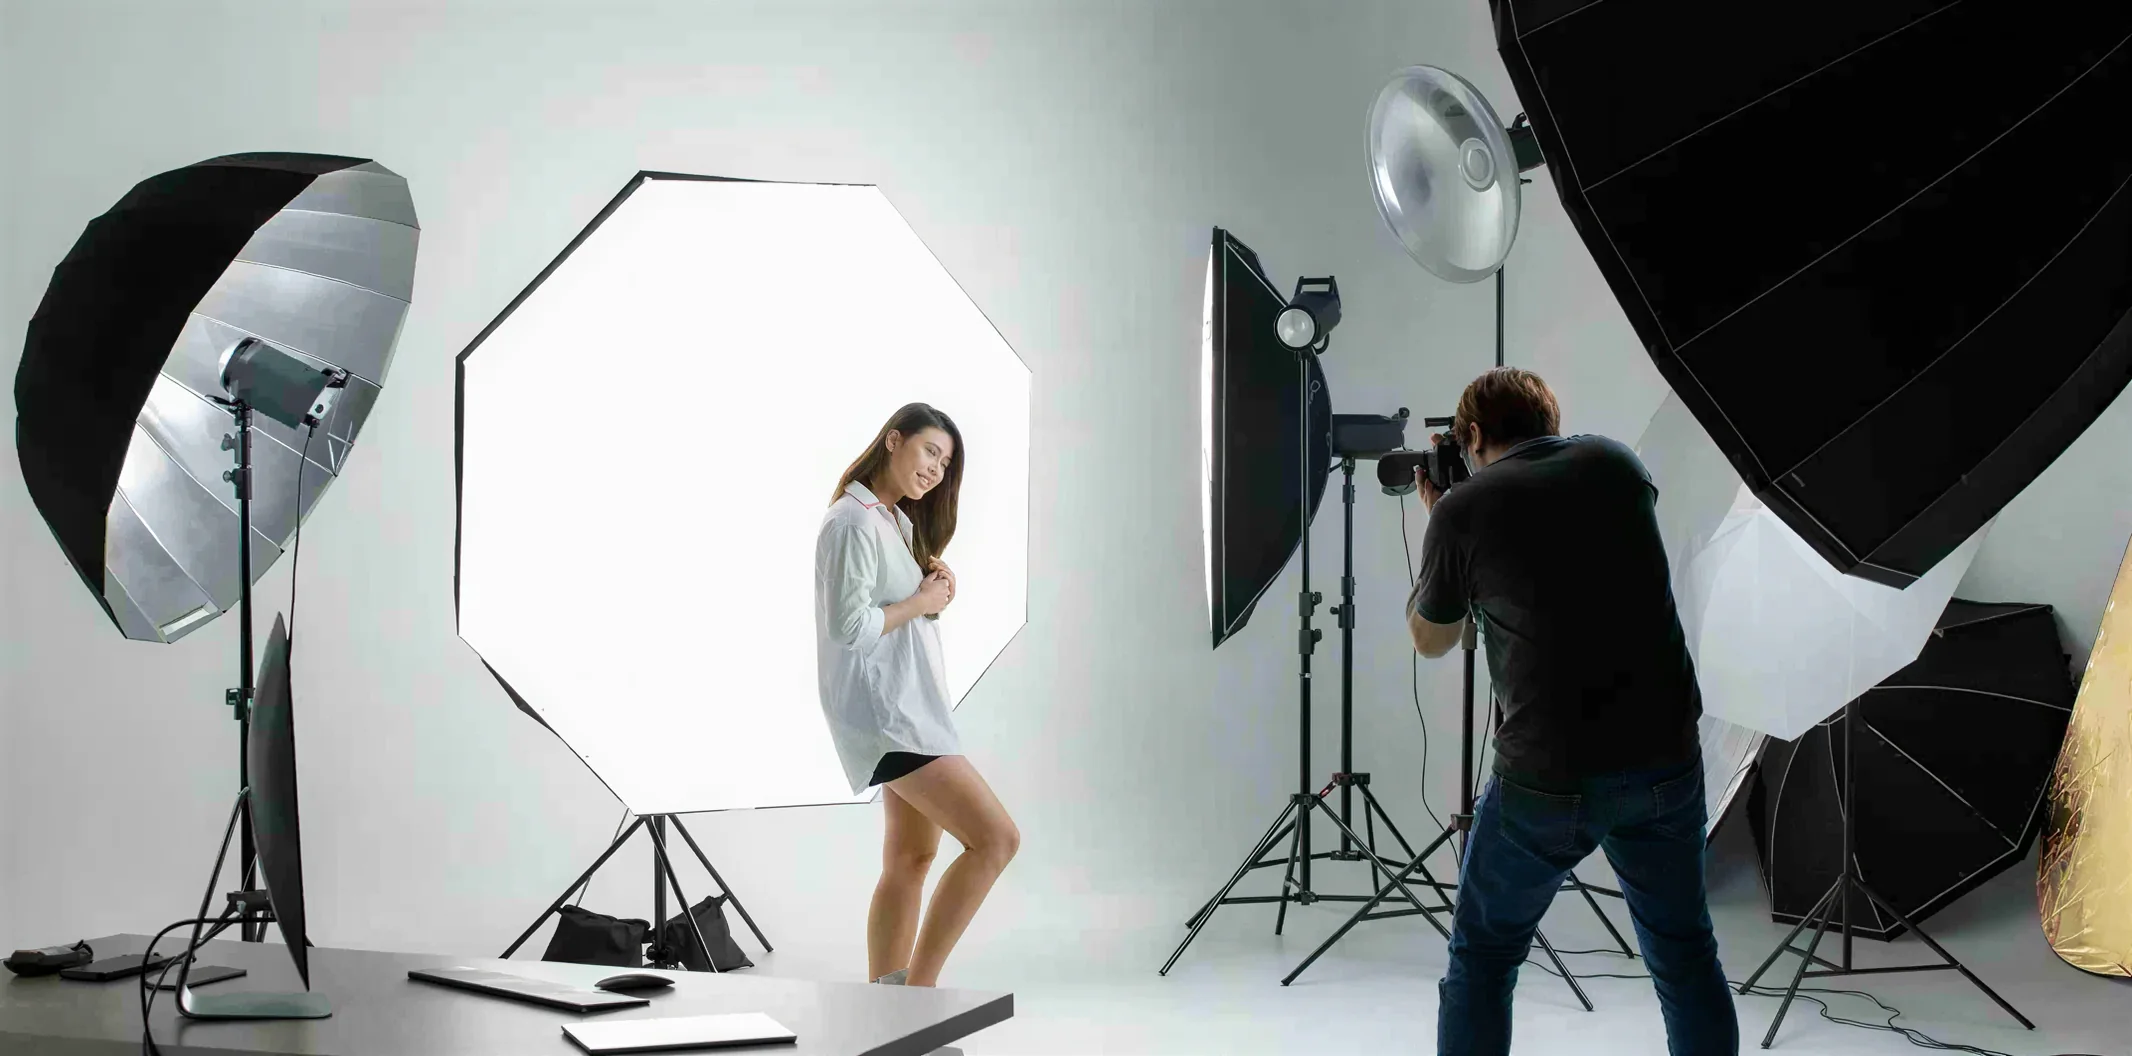
The line items, at the public rates in our cost guide:
- Photographer: $500 to $3,000 a day (Shopify).
- Model: $55 to $275 an hour freelance; agency models $110 to $150 an hour plus about a 20% agency fee (soona).
- Studio: $30 to $150 an hour (Peerspace).
- Stylist: $600 to $1,500 a day, plus time to pull and return garments (Dixie Dixon).
- Hair and makeup: $150 to $800 a day (Squareshot).
- Retouching: $5 to $20 an image basic, $50 to $150 extensive (Squareshot).
A rush turnaround adds 25% to 200% of the job (Shopify). Under the Artist Management Association’s guidelines, a reshoot you ask for is paid in full on top of the original job. And no invoice shows your own time, or the two to four weeks from booking to edited files.
A real shoot is still right for a campaign image, a lookbook, or a fabric that has to be photographed to be believed. If you book one, shoot flat lays of every piece while the set is up. The worked budget, sources linked, is in what a fashion photoshoot really costs.
Can AI put your clothes on a model?
The short answer
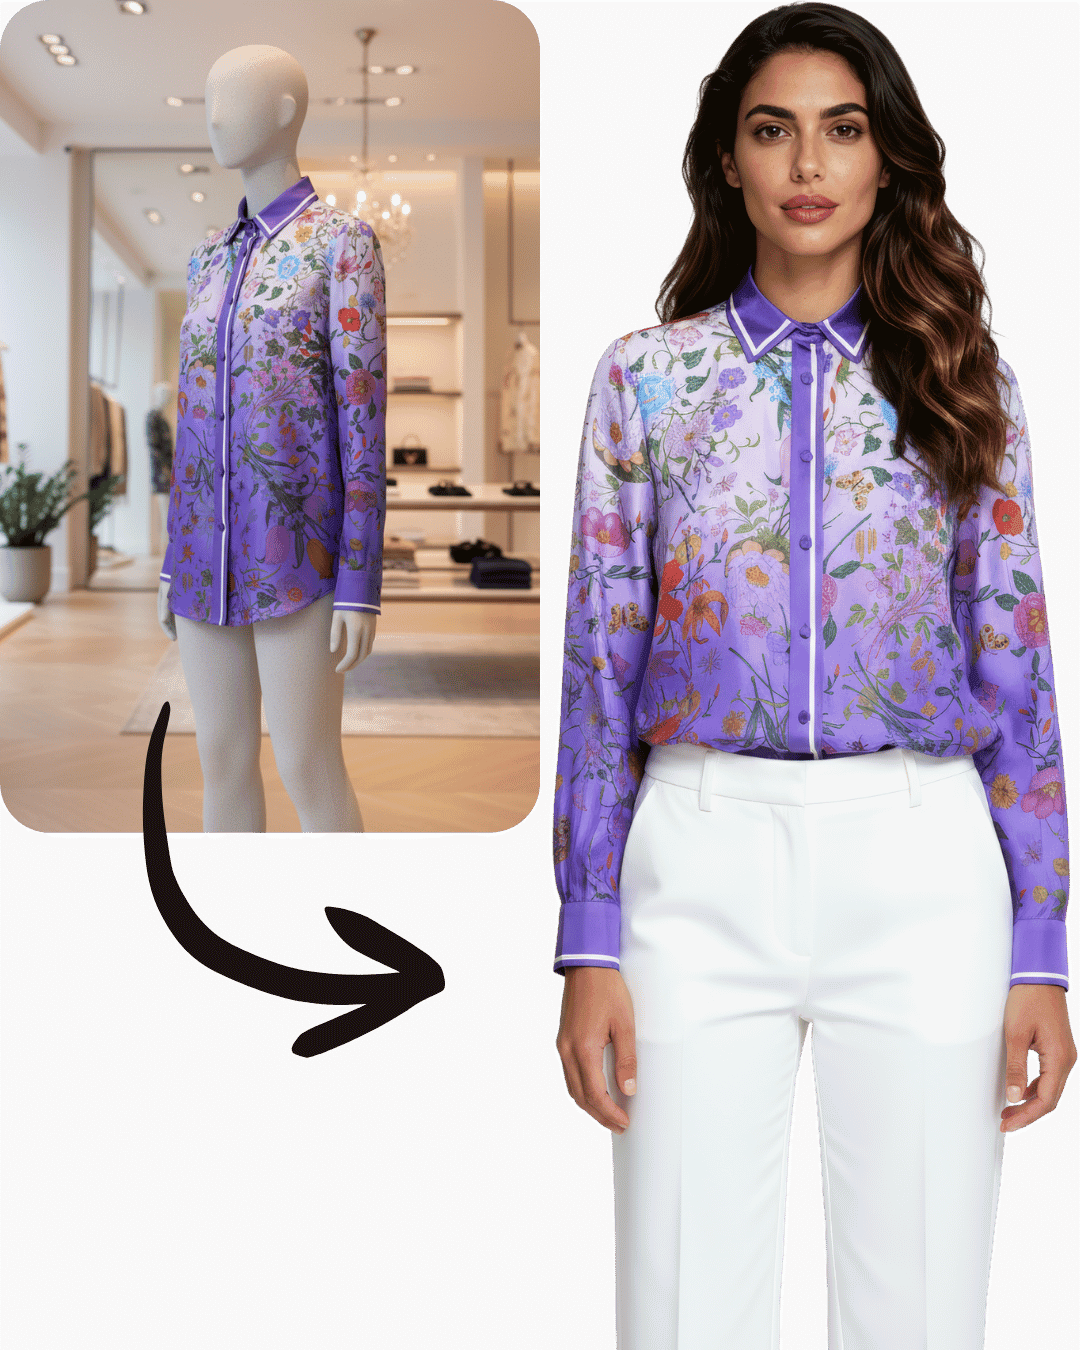
Yes. Upload a photo of your real garment, flat, on a hanger or on a mannequin, pick a model, and the garment is shown on that person. Check fine print, logos, sheer fabric and exact colour at full size before you publish.
It is the method built for a seller with a phone and no model. Choose from 500+ models, including kids models, or use your own model or yourself; there is a hijab setting too. One credit is one photo, a retry costs a credit too, and unused credits roll over while you are subscribed. See AI clothing photography and the AI clothing model library.
 Before
 After
After Before
 After
AfterKnow your hardest pieces. A slogan can come back with a letter reshaped. Chiffon and lace can drape wrong, because the flat photo never showed a body. Sequins can flatten, and a brand colour can drift a shade. That makes a garment one that may need more than one attempt, and some never settle.
Where AI earns its keep is the collection: every garment on the same model, so twenty products look like one shoot. The collection demo shows ten garments on one model, then the same pieces on a second.
The test that matters
Try it on your hardest garment first.
Sellers judge an AI photo tool on the piece most likely to go wrong: a print, a logo, sheer fabric or a detail that has to sit exactly right. Check the result at full size before you publish it. Here: a double-breasted blazer.
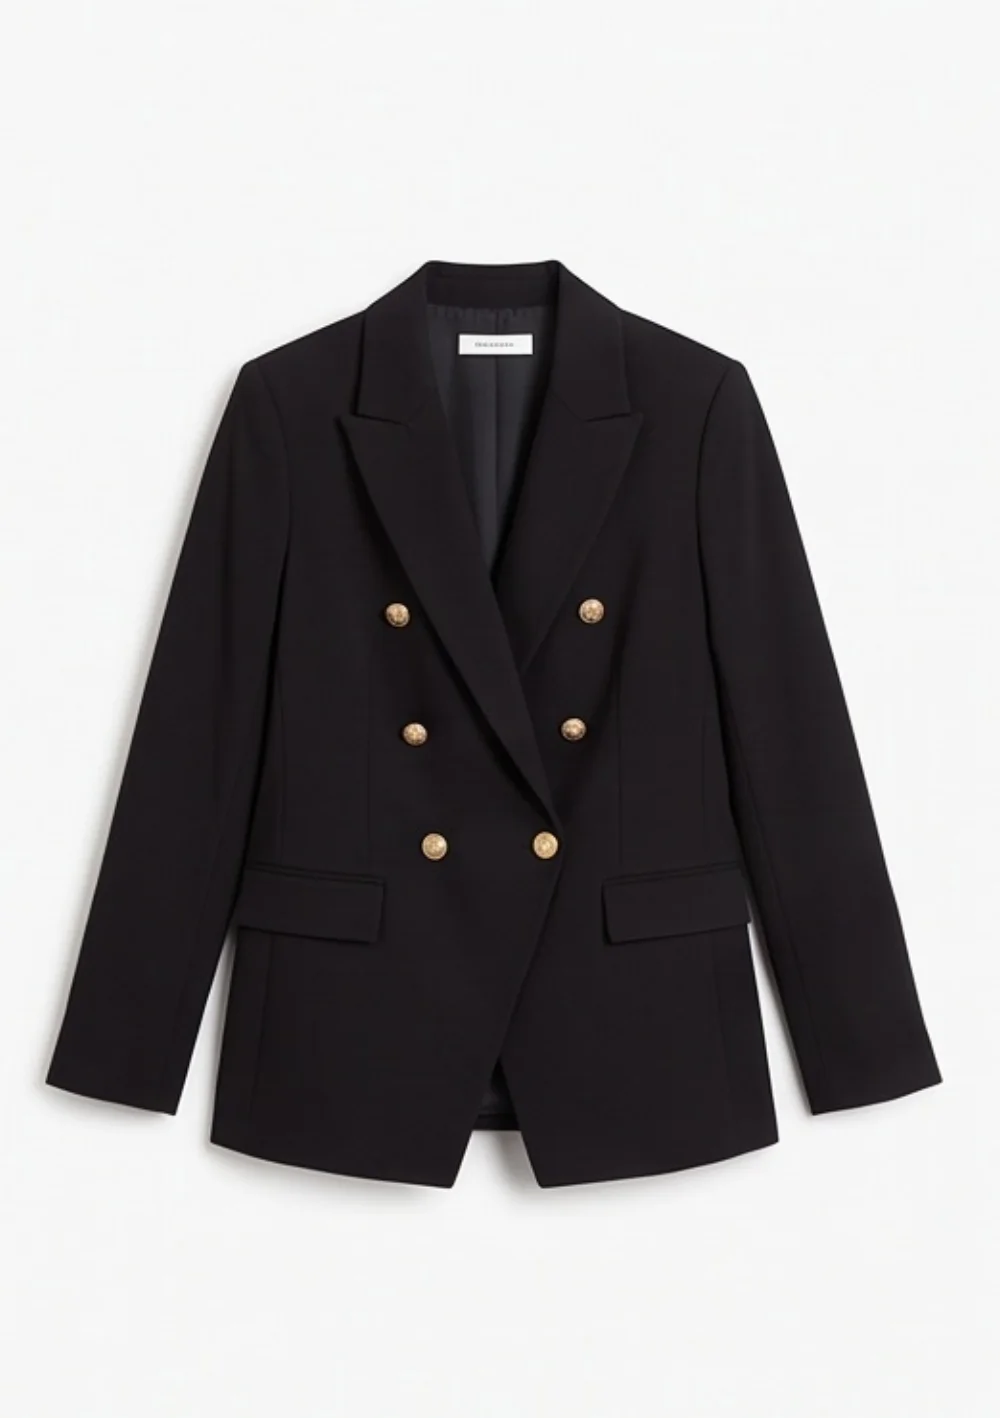
01 Product photo
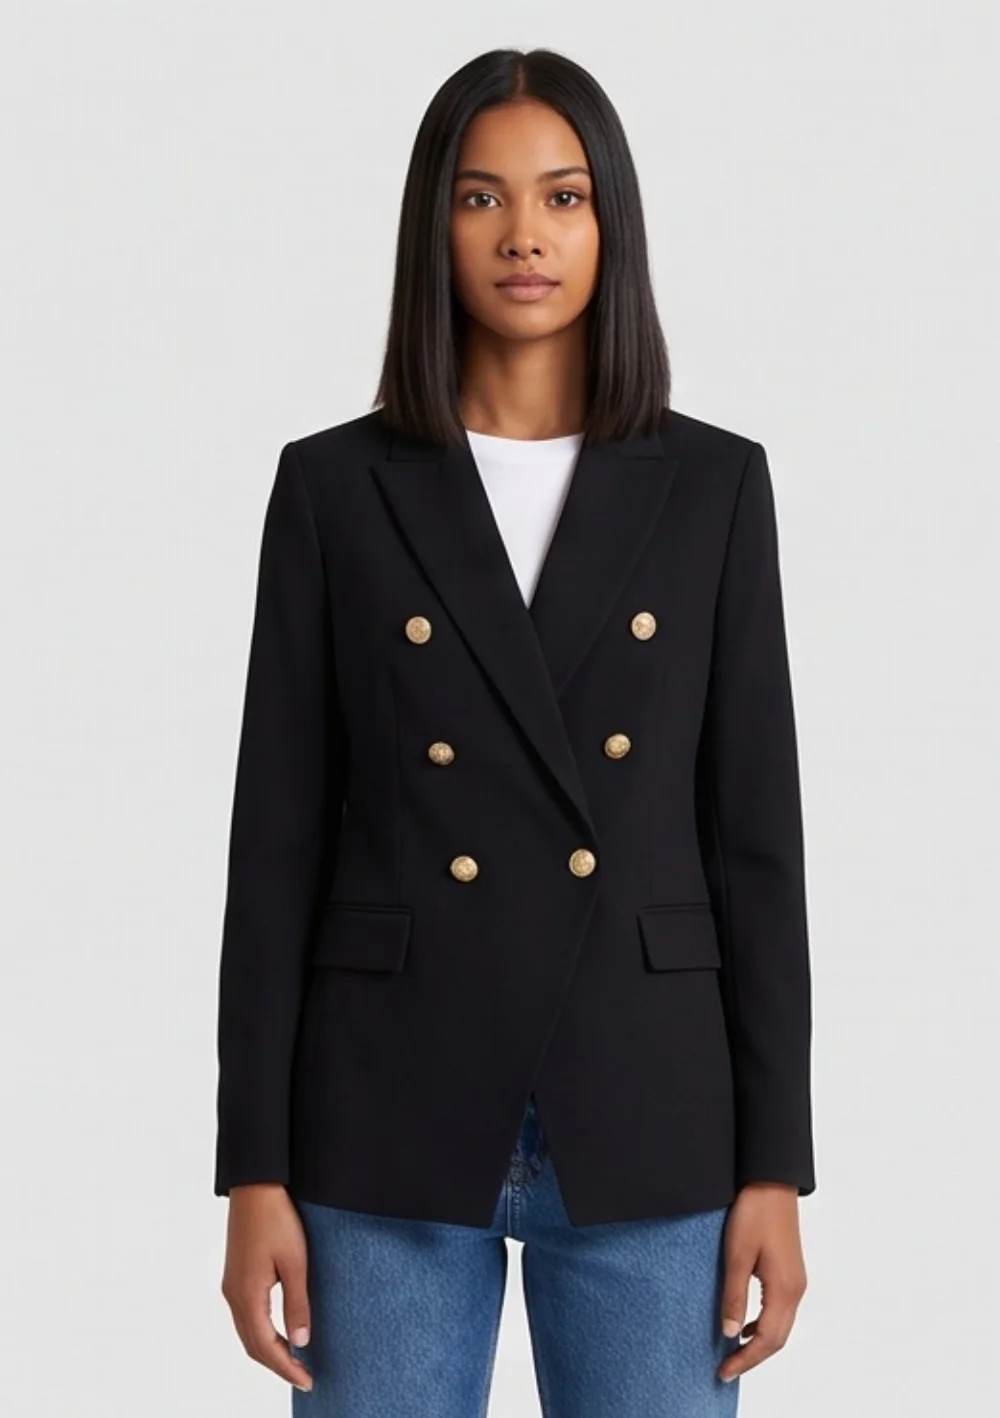
02 On the model
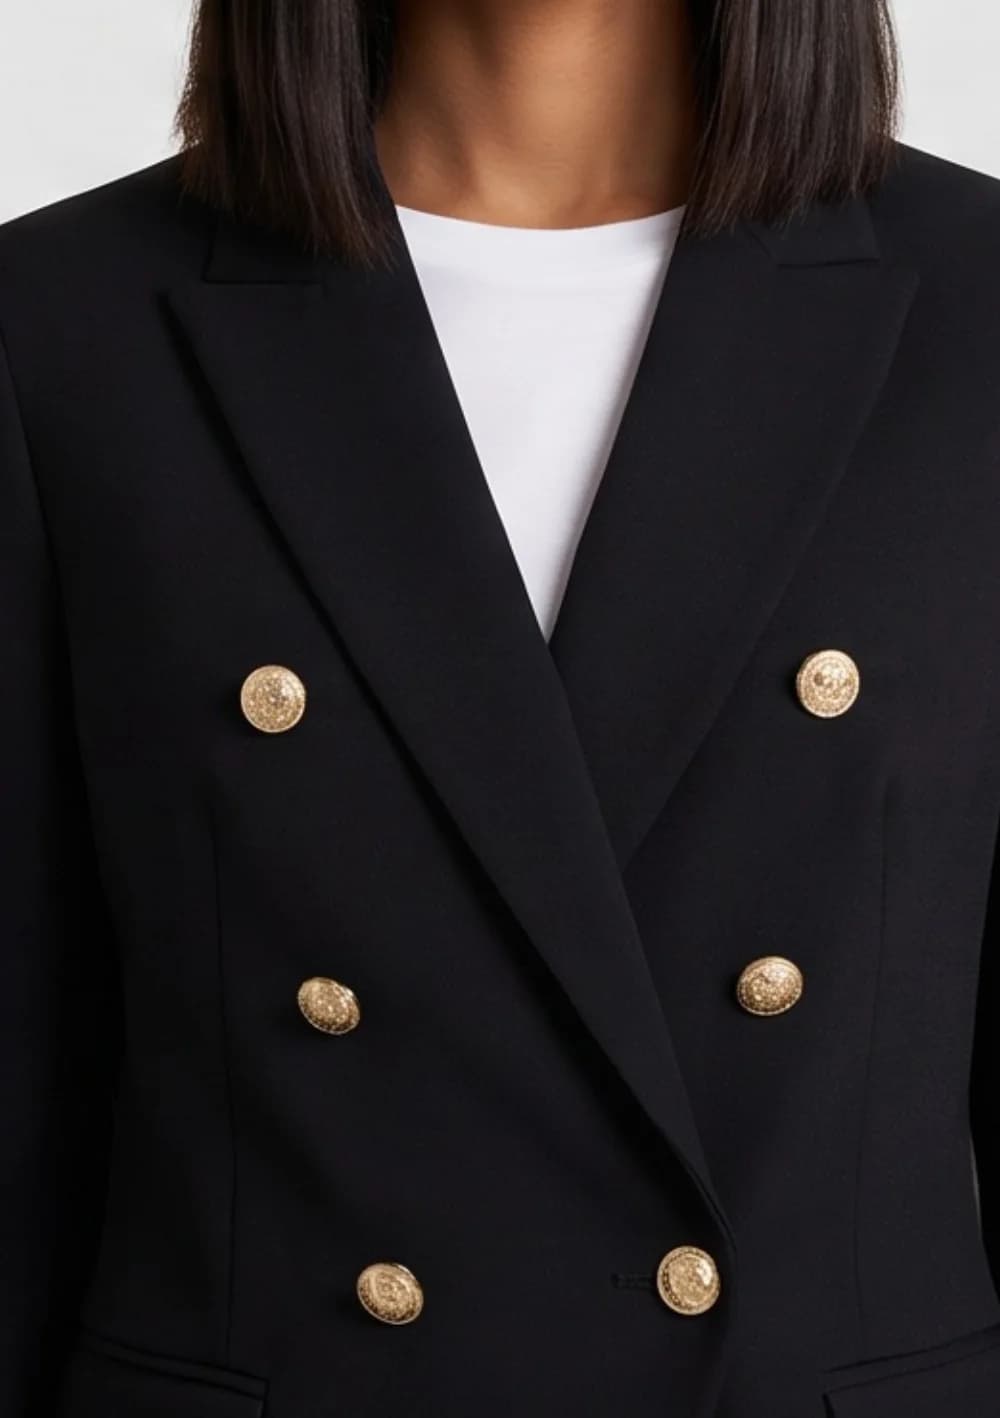
03 Full-size check
10 free photos, no card.
Which method suits your shop?
The short answer
Match the method to where the photo goes: flat lays for resale one-offs, on-model photos made from flat lays for a brand’s collection, a clean ghost or on-model shot for a marketplace main image, and on-model scenes for social media and ads.
| Your situation | What to shoot | Why |
|---|---|---|
| Resale one-offs | A flat lay or hanger shot of the actual item, with close-ups of the label and any wear | Each piece sells once, so honest detail beats polish |
| A small brand’s first collection | Flat lays of everything, then on-model photos made from them, all on one model | Every product page matches; save a real shoot for the campaign image |
| A marketplace main image | The whole garment on a plain background, as a ghost mannequin or on a model | Each marketplace sets its own rules; read them in your seller account first |
| Social media and ads | On-model photos in a real-looking setting, a few poses per piece | The white-background shot belongs on the product page; a feed needs a scene |
Most small brands mix them: flat lays and close-ups on every listing, on-model photos for product pages, and a real shoot only for campaigns. Photos made on a paid Tryly plan can be used on your store, in ads and on social media.
How do you keep clothing photos consistent?
The short answer
Fix everything except the garment: the same background, light, camera height, crop and model for every product. Then edit every photo the same light way: correct white balance and exposure, clean up lint and dust, and never change the garment’s colour.
If you are working out how to photograph clothes for a website, consistency matters more than any single photo: a grid of matching photos reads as one brand. Set up once and write it down:
- Background: one colour and material for every product.
- Light: the same window at the same time of day, or the same lamps.
- Camera: tape marks, and the same height, distance and crop.
- Styling: one rule for tucks, sleeves and shoes.
- Model: the same person, or the same AI model, across the collection.
- Format: one aspect ratio for every main image. Shopify’s help centre recommends a consistent ratio and says 2048 × 2048 pixels usually displays best for square product images.
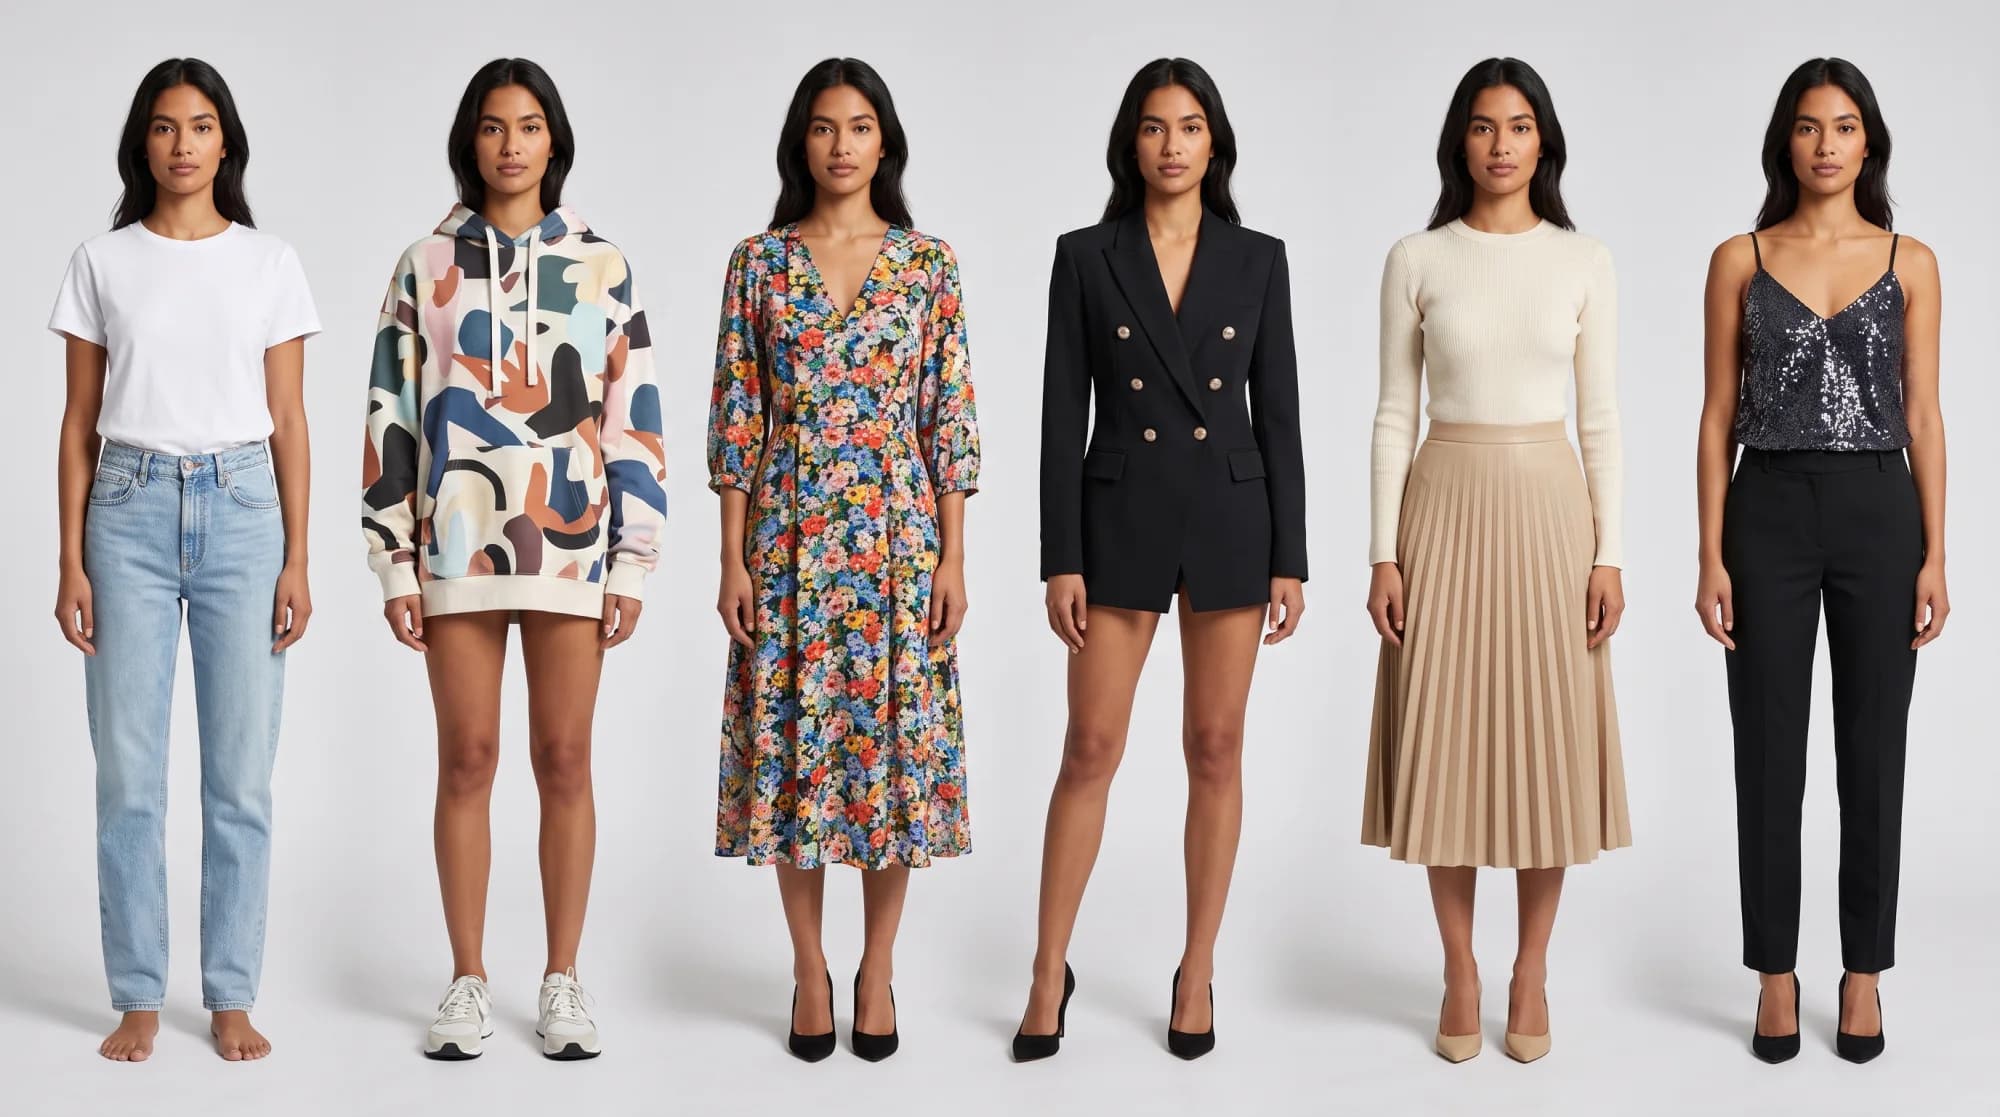
Clothing photography editing: what to fix and what to leave alone
Edit to make the photo match the garment, not to improve the garment.
- White balance first. Make white read as white: shoot a sheet of white paper in the first frame and set the balance from it.
- Exposure second. Brighten until the background is clean, but stop while white fabric still shows its texture.
- Straighten and crop to your template.
- Clean up lint, threads and dust. On resale pieces, leave real wear visible.
- Never change the garment’s colour. A shade that doesn’t match what arrives is a reason to send it back, so compare every finished photo, AI results included, with the garment in daylight.
- Batch it. Save the edit as a preset and apply it to the whole set.
What do sellers ask about clothing product photography?
What is the best way to photograph clothes for a website?+
Shoot every product the same way: the whole garment, sharp, on a plain background, in soft daylight, with the same crop. Lead with a photo that shows it worn, on a model or as a ghost mannequin, then add a flat lay and close-ups of the fabric and label. If you can’t book models, AI can put the garment from your flat lay on one.
Is flat lay or on-model better for selling clothes?+
They do different jobs. A flat lay shows colour and detail and costs almost nothing, but it can’t show fit. An on-model photo shows fit and drape, and Google’s Merchant Center image guidelines ask for clothing to be shown worn by people. Use both: the on-model photo first, then the flat lay and close-ups.
How do you photograph clothes without a model?+
Lay the garment flat and shoot from directly above, hang it against a plain wall or door, or dress a mannequin. A ghost mannequin shot removes the mannequin, and Tryly can make one from a flat or hanger photo with no mannequin at all. To show the garment worn, AI can put it on one of 500+ models, your own model or yourself.
What background is best for clothing photos?+
A plain, light background that contrasts with the garment: white or light grey paper, board, a painted wall or a clean sheet. Use light grey for pale garments so their edges don’t disappear, keep the same background for every product, and check each marketplace’s main-image rules in your seller account.
How much does clothing product photography cost?+
Doing it yourself costs almost nothing in cash. On public rates, a photographer, model and studio cost roughly $1,180 to $6,400 for one day (Shopify, soona and Peerspace), before styling or retouching, and basic retouching adds $5 to $20 an image (Squareshot). AI on-model photos on Tryly start from $9.99/month on the Starter plan billed annually, as low as $0.25 per photo, with 10 free photos and no card.
Written by
Elena Varga
Head of Content, Tryly Academy
Former e-commerce photo producer who ran catalogue shoots for fashion labels for over a decade. Writes the Academy’s guides.
- 11 years in fashion e-commerce
- 1,200+ catalogue shoots produced
Expert review
Sofia Moretti
Fashion photographer · Expert reviewer
Has shot campaigns and on-model e-commerce for fashion brands for 14 years. Reviews every Academy article for accuracy.
- 14 years in fashion photography
- Campaign and catalogue work across Europe
How we work: every Academy article is written by a specialist, reviewed by a working fashion photographer, and re-checked against its sources when prices or rules change.