Guide
Product photography setup at home: a small studio for clothes and accessories
How to build a product photography studio in a spare corner: the space each kind of product needs, the backdrop, light, camera and tripod, the styling tools nobody mentions, a starter kit in three budget tiers, and when it is cheaper not to build one at all.

 By Elena Varga
 · Reviewed by Sofia Moretti |Fact-checked|12 min read
Key takeaways
- 1Build the studio around your best window, not your spare corner. A white backdrop, a foam board reflector, a tripod and the phone you own are the core of every product photography setup.
- 2Size it by product: a desk for accessories, a clear wall for dresses and coats, floor space for flat lays. Then add the styling kit that makes clothes look right on camera: steamer, clips, lint roller.
- 3Leave it set up and mark it with tape, so every product is shot the same way. For on-model photos without a model, upload your product photo to Tryly instead of building a bigger studio.
10 free photos, no card. Photos as low as $0.25 each.
On this page+
How do you set up product photography at home?
The short answer
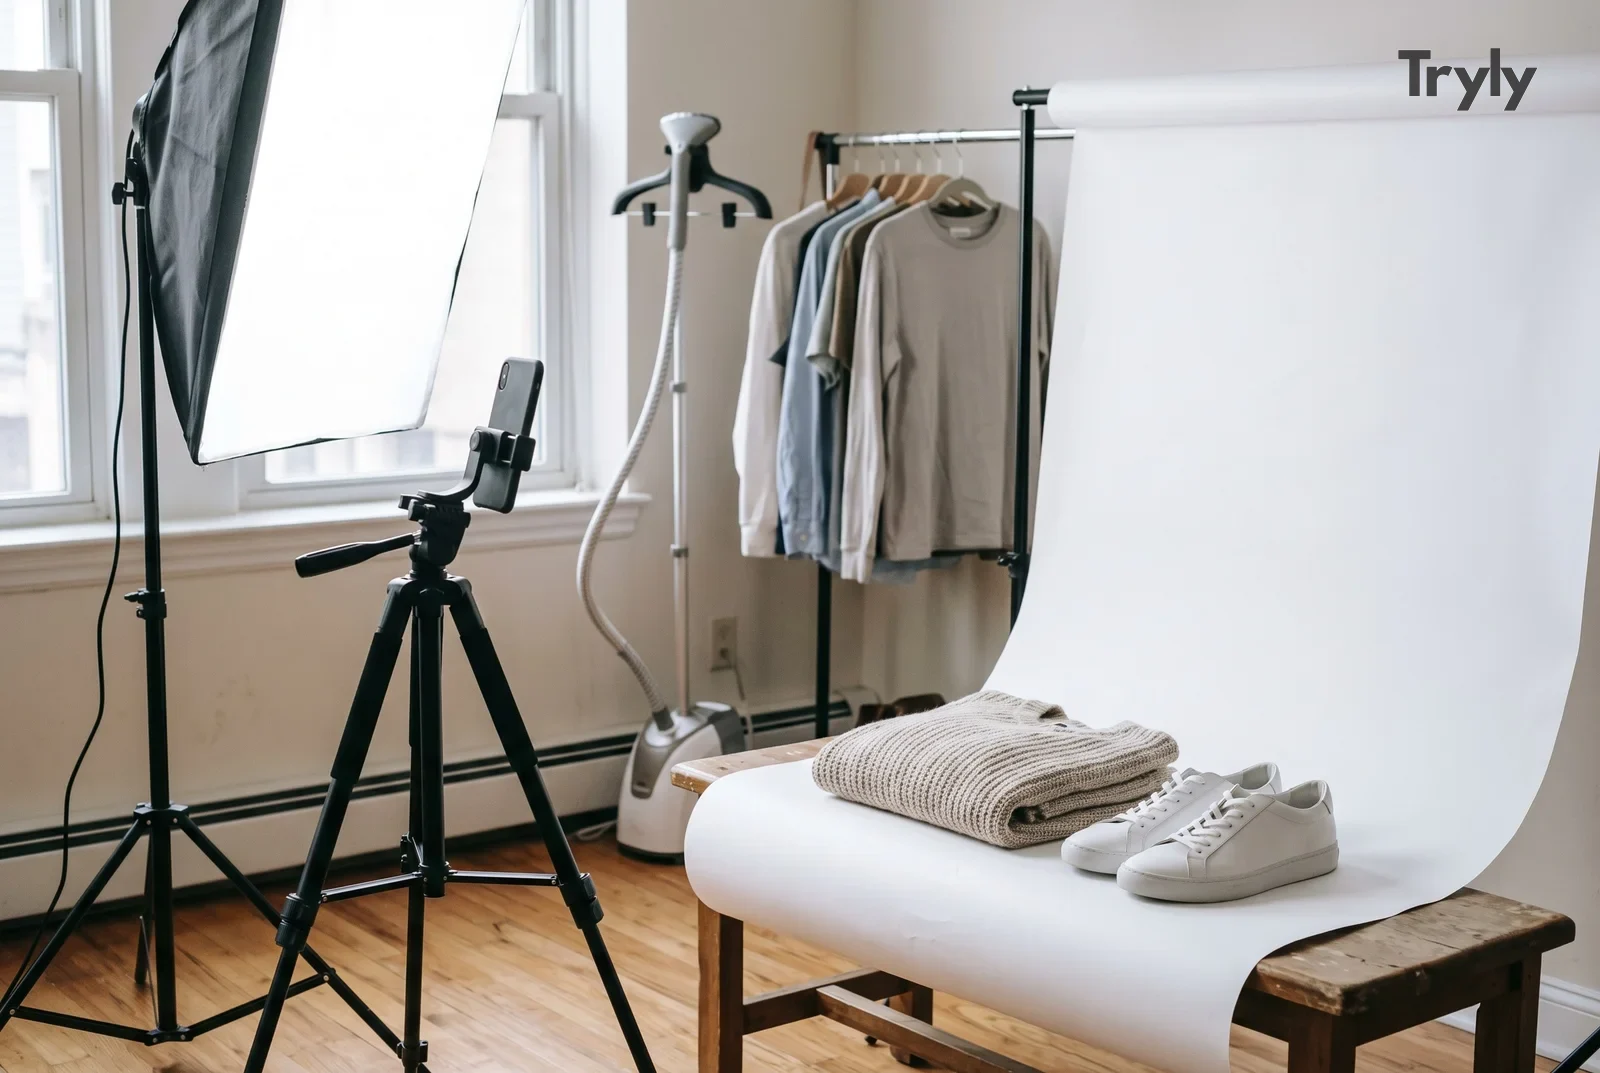
Pick the wall beside your biggest window, out of direct sun, and set up a white backdrop there: poster board curved up the wall for accessories, or seamless paper on a stand for clothing. Stand a white foam board opposite the window as a reflector, put your phone on a tripod, turn the room lights off, and leave the setup up so every product is shot the same way.
The rest of this guide sizes that setup to what you sell. Lighting in depth is covered in the guide to product photography lighting, and the background and edit in white background product photography. This guide is about the studio around them.
How much space does a home product photography studio need?
The short answer
Less than most sellers expect. Accessories need a desk-sized table beside a window. Hanging clothes need a clear stretch of wall about two arm spans wide and a few steps back for the camera. Flat lays need a surface bigger than the garment with room to stand over it.
Think in stations, not in rooms. A station is one backdrop, one light and one camera position for one kind of product. Most small brands need one or two, and they can share the same window.
| Station | What it shoots | Space it needs | Built from |
|---|---|---|---|
| Tabletop | Jewelry, watches, glasses, folded scarves, hats, small bags, shoes | A desk-sized table beside a window | Paper sweep, foam board, mini tripod |
| Flat lay | T-shirts, knits, jeans, kidswear, outfit sets | A clear floor or table area larger than the biggest garment, with room to stand over it | White surface, overhead phone arm or a step stool |
| Hanging or mannequin | Dresses, coats, blazers, shirts, anything with drape | A clear stretch of wall about two arm spans wide, plus a few steps back for the camera | Backdrop stand or plain wall, hook or rail, dress form, steamer |
| On-body corner | Fit and scale shots of you or a friend | The hanging station with extra room to step back | Tall tripod, self-timer or phone remote |
The window decides where the studio goes
Light is the one thing you cannot move, so start from it. Choose the largest window that does not get direct sun at the hour you usually shoot, and build the station so the window sits to one side of the product, never behind it or behind you. A spare bedroom with a poor window is a worse studio than a living room corner with a good one.
Which backdrop should a small product studio use?
The short answer
A white, seamless sweep: one surface that curves from under the product up behind it, with no fold or horizon line. Poster board does it for small items; a roll of seamless paper on a stand does it for clothing.
Amazon’s seller guide to product photos describes the two versions most home studios use: a tabletop backdrop clipped to a table with the other end against a wall, and a stand-mounted sweep for larger items. The same guide says that in most cases product shots should be on white, RGB 255, 255, 255.
- Accessories: white poster board or foam board, curved and taped to a box or the wall. Wide enough that the edges never show in the frame.
- Clothing on a mannequin or hanger: a roll of seamless paper on a backdrop stand, rolled down to the floor and out under the mannequin’s base. A clean, plain wall is the free version.
- Flat lays: a large white foam board, white paper or a white sheet pulled tight, on the floor or a big table.
White is the safe choice for the main photo, not the only one. For colored paper, textures and room backgrounds for extra photos, see the guide to product photography backgrounds.
What lighting does a product photography setup need?
The short answer
One large, soft light from the side and a white board on the other side. A window out of direct sun is the best free light there is; add one continuous daylight LED with a diffuser only when you shoot after dark.
The two rules that matter for the setup: never mix the window with ceiling lights or lamps, since each has a different color, and keep the flash off. A white foam board opposite the window is your second light, and it costs almost nothing. Amazon’s guide recommends white bounce cards to fill in shadows, and a light tent, a box with translucent walls, for spreading light evenly around small objects.
Window direction, diffusers, one-lamp and lightbox setups, and how to light knits, satin, black, white and sequins are all in the lighting guide.
Phone or camera, and which tripod?
The short answer
A recent phone is enough for most stores, as long as it is on a tripod. Buy the tripod before any camera: it keeps photos sharp and, just as important, keeps every product framed the same way.
Amazon’s guide says the camera does not have to be the most expensive one and that a smartphone can do the job, and that using a tripod rather than your hands keeps the camera still and avoids blurry pictures. A camera earns its place later, when you need more detail in fine prints, jewelry or close-ups, or shoot in low light.
Which tripod for which station
- Mini tabletop tripod for jewelry, watches, glasses, shoes and bags, with the lens at product height.
- Tall tripod for hanging garments, mannequins and on-body shots, set to chest height of the garment.
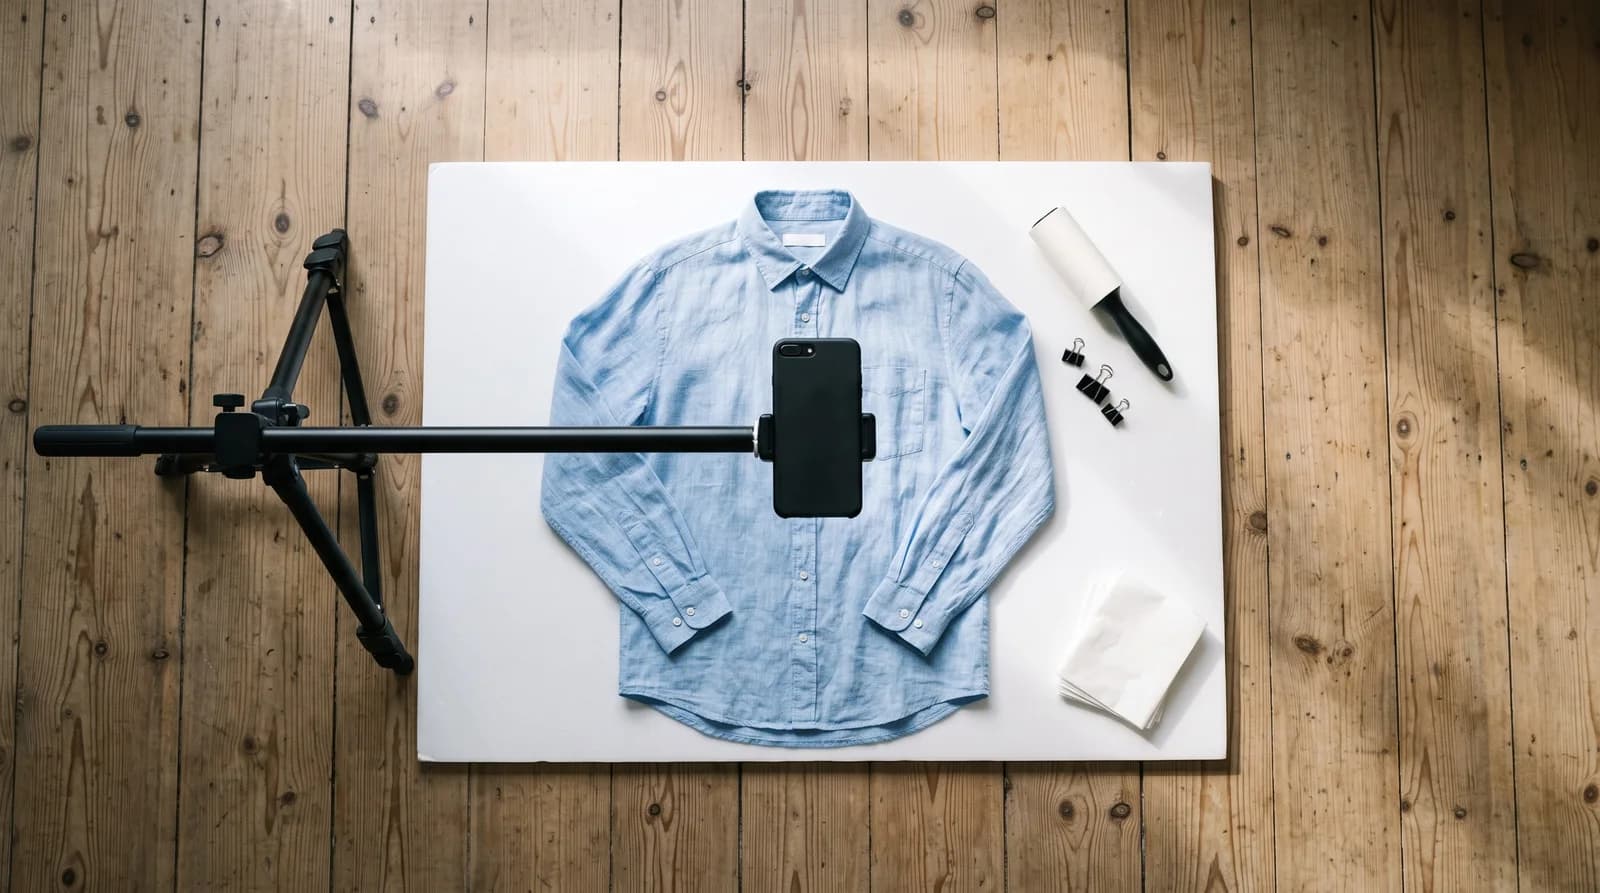
- Tripod with a sideways arm, or an overhead phone arm clamped to a table, for flat lays, so the phone sits level directly above the garment.
Phone settings for every session
Use the 1× or 2× lens, never the ultra-wide, which stretches whatever is closest. Turn on the grid to keep lines straight, tap the product to focus, then press and hold to lock focus and exposure. Use the self-timer or a remote so pressing the button does not shake the phone.
What size the photos need to be
Any recent phone clears these, so frame tightly rather than worrying about megapixels:
| Where it goes | What its own page says | Source |
|---|---|---|
| Amazon (seller guide) | Larger than 1,000 px on each side for zoom; product fills 85% or more; most product shots on white (RGB 255, 255, 255) | Amazon’s guide to product photos |
| Google Merchant Center | At least 500 × 500 px, about 1500 × 1500 px or more recommended; product 75% to 90% of the image | Google’s image requirements |
| Shopify | 2048 × 2048 px usually displays best for square images; up to 5000 × 5000 px; files under 20 MB | Shopify Help Center |
The fill rule is the one that moves your tripod: the product should take up most of the frame. More platforms are compared in the guide to product image size requirements.
Which styling tools does a clothing photo setup need?
The short answer
A handheld steamer, clips or pins, a lint roller and tissue paper. They cost little and fix the problems a camera exaggerates: creases, loose fabric, lint on dark colors and bags that slump.
For clothes, the styling kit often matters more than the camera: on camera, a garment that hangs badly looks like a garment that fits badly.
Handheld steamer
Creases read as shadows on camera, and a steamer works on a hanging garment without an ironing board. Steam knits and silks from a short distance.
Clips and pins
Bulldog clips or clothes pegs behind a mannequin or hanger take in loose fabric so the front sits smooth. Pins hold a flat lay sleeve in place.
Lint roller and tape
Black fabric shows every hair and fiber at full size. Roll before every shot; a loop of tape picks up the last bits.
Tissue paper
Stuffs bags, hats and shoes so they keep their shape, and fills sleeves on a flat lay.
Cotton gloves and a cloth
Fingerprints show on watches, glasses and polished jewelry. Wipe, then handle with gloves.
Hangers in one style
The same plain hanger in every photo keeps the catalog consistent.
Masking tape and a marker
Marks where the product, tripod feet and reflector go, so every product is framed the same.
Mannequin, hanger or flat lay: which station do you build first?
The short answer
Build the station that suits most of what you sell. Flat lay for T-shirts and knits, a mannequin or hanger for dresses and outerwear, and a tabletop for shoes, bags and jewelry. Add a second station only when a product type keeps looking wrong in the first.
| You mostly sell | Build first | Why |
|---|---|---|
| T-shirts, sweatshirts, knits | Flat lay | Shape is simple and the whole garment fits in one overhead frame. |
| Dresses, coats, blazers | Mannequin or hanger | Drape and length only show when the garment hangs. |
| Jeans and trousers | Flat lay, then hanger | Flat for the front and back, hanging for the leg line. |
| Shoes and bags | Tabletop | They stand on their own and need a camera at product height. |
| Jewelry, watches, glasses | Tabletop, small | A tight sweep and a reflector close in matter more than space. |
| Scarves and hats | Tabletop, then flat lay | Folded or styled on the table, then laid out to show the full print. |
A dress form is the most useful single purchase for a clothing studio, because it gives a garment shoulders and a waist. The pros and cons of flat lay, mannequin, ghost mannequin and model are compared in the guide to clothing product photography, and the overhead station is covered step by step in flat lay photography.
What is in a product photography starter kit, by budget?
The short answer
Start with what you own, add a tripod, foam boards, seamless paper and a steamer, and only then a backdrop stand, one continuous light, a dress form and a camera. Spend in that order and every step improves the photos.
Tier 1: free, from what you own
Your phone, a window, white poster board or a white sheet, a stack of books as a tripod, a plain hanger and a door or bare wall, clothes pegs as clips, an iron, tape. Enough for small items, flat lays and hanging shots of simple garments.
Tier 2: a small spend
A phone tripod with a sideways arm, two sheets of white foam board, a roll of white seamless paper with clamps, a handheld steamer, a pack of clips and pins, a lint roller, and a clip-on daylight LED with a diffuser for evenings.
Tier 3: a dedicated corner
A backdrop stand with a full-width paper roll, one continuous daylight LED with a softbox, a dress form or ghost mannequin form, a rolling rail for the next batch, a lightbox for jewelry and watches, and a camera if your phone is holding you back.
What is not on any list
A second light before a reflector, a ring light for products, a camera before a tripod, and colored backdrops before a white one. Each looks like progress and rarely changes the photo.
Gear prices change too often to list here. For what a home studio costs against a photographer or on-model photos, see the guide to product photography cost.
How to set up a product photography studio, step by step
The short answer
Set it up once by the window, mark every position with tape, check one test shot at full size, then shoot the same shot list for every product. Here are the eight steps in order.
- Choose the spot. Pick a wall beside your biggest window, out of direct sun, in a room where the setup can stay up between sessions.
- Build the backdrop. Curve white poster board or seamless paper from the table up the wall for small items, or hang a paper roll on a stand down to the floor for garments.
- Place the light. Keep the window to one side of the product, turn the room lights and flash off, and stand a white foam board opposite the window to fill the shadows.
- Fix the camera. Put the phone on a tripod at product height, or on an overhead arm for flat lays, use the 1× or 2× lens and turn on the grid.
- Prepare the product. Steam it, lint-roll it, clip loose fabric behind the mannequin or hanger, stuff bags and shoes, and wipe anything shiny.
- Mark every position with tape. Tape where the product, the tripod feet and the reflector stand, so the next product is framed the same way.
- Take a test shot and check it. Photograph a sheet of white paper for the white balance, then check the first product photo at full size: sharpness, true color, and the product filling most of the frame.
- Shoot the shot list in order. Front, back, side, detail, label and any flaw, in the same order for every product, then name the files by product as you go.
How do you shoot a whole collection in one session?
The short answer
Prepare everything first, then shoot one station at a time with a written shot list, and edit the whole batch together. Switching between steaming, shooting and editing for each product is what turns one hour into an afternoon.
- Prep the batch. Steam, lint-roll and tag every product, and hang them on a rail in shooting order.
- Group by station. All flat lays, then all mannequin shots, then all tabletop items. The setup changes once, not with every product.
- One shot list, same order. Front, back, side, a detail, the label and any flaw. The same order means no product misses a shot.
- Name files as you go. A product code in the file name saves an hour of matching photos to listings later.
- Edit as a batch. Set the white balance from the white paper frame, crop every photo to the same ratio, and compare the thumbnails side by side.
What are the most common product photography setup mistakes?
The short answer
Building the studio away from the best window, buying a camera before a tripod, a backdrop too small for the longest garment, mixed light sources, no steamer, and rebuilding the setup every session.
- Building the studio where the light is worst. The window decides where the setup goes, not the spare corner.
- Buying a camera before a tripod and a reflector. A steady phone in good light beats a new camera in bad light.
- A backdrop smaller than the product. Size it for your longest dress or coat, not your average item.
- Mixing a window and a ceiling light. One light source, one color.
- Taking the setup down after every session. Leave it up and mark it with tape; rebuilding it is where the hours go.
- A different hanger, angle or crop for each product. Write the shot list down and shoot it the same way every time.
When is it cheaper to skip the setup and make on-model photos?
The short answer
When the photo you are missing is the on-model one. A home studio handles product photos well, but adding a model means booking a person, a bigger space and a full day. Uploading your product photo to Tryly puts it on a model instead, at as low as $0.25 per photo.
The sums for one collection
Take 40 new products with four on-model photos each: 160 photos. Shopify’s product photography pricing guide puts photographers at $50 to $350 per image, or $500 to $3,000 per day, before the model, studio and styling. At Tryly’s lowest rate, the same 160 photos cost $40.
| On-model photos | At $0.25 per photo |
|---|---|
| 10 products × 4 photos = 40 | $10 |
| 40 products × 4 photos = 160 | $40 |
| 100 products × 4 photos = 400 | $100 |
How it fits the setup you just built
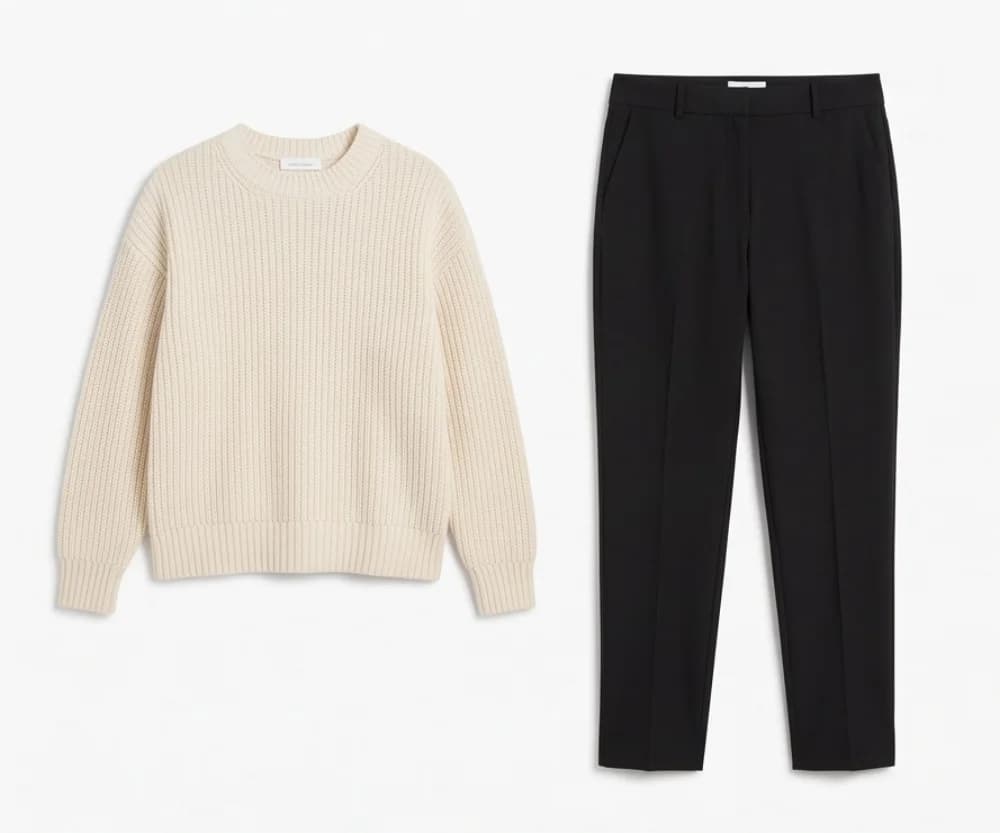
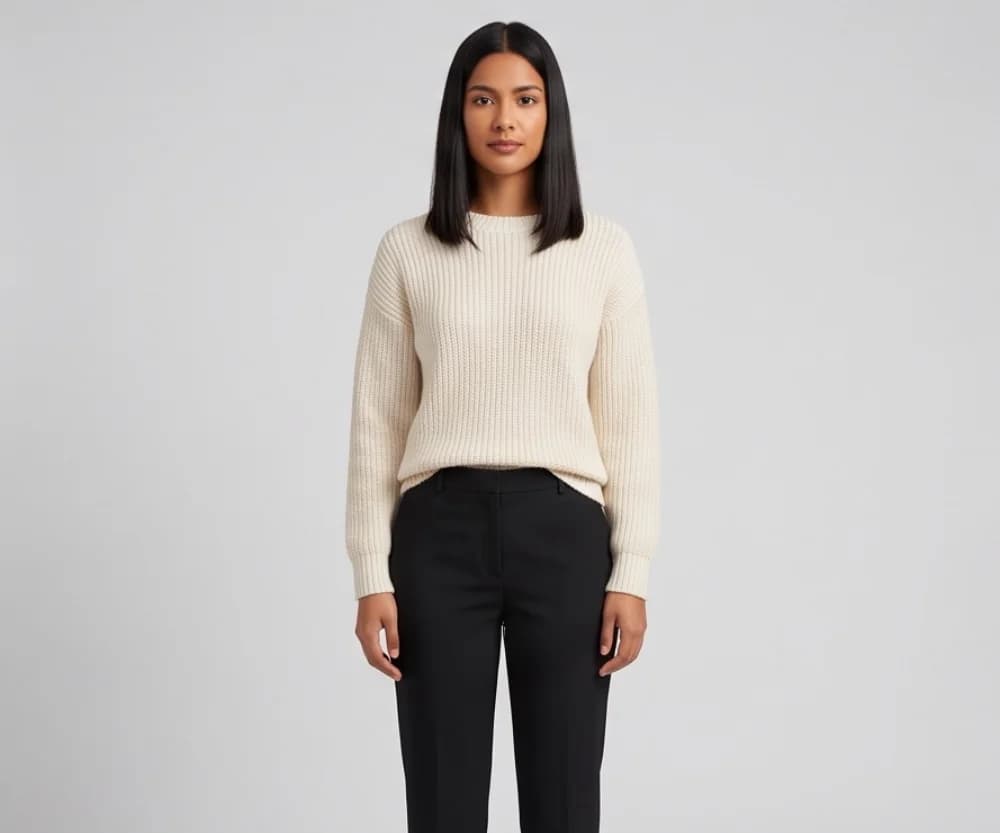
Your studio still makes the input: one sharp photo of the product, flat, on a hanger or on a mannequin, in soft light. With Tryly’s AI clothing photography tool you upload it and choose one of 500+ models, or your own model or yourself, with kids models and a hijab setting too. One credit is one photo.
01 Your photo
02 On a model
03 Full-size check
Even a quick hanger shot works as a starting point. The same flow covers shoes, bags, hats, watches, jewelry, glasses and scarves, and ghost mannequin photos too, so you do not need a bigger studio for each.
 Before
 After
AfterKeep your own photos for marketplace listings such as Etsy, Depop, Vinted and Mercari; the studio you built stays useful there. Start with 10 free photos, no card. After that, plans start from $9.99/month, which is from $0.33 per day.
Questions sellers ask about product photography setup
What do I need for a product photography setup at home?+
A window, a white backdrop such as poster board or seamless paper, a white foam board as a reflector, a tripod and your phone. For clothing, add a steamer, clips and a mannequin or a plain hanger. Most sellers already own half of it.
How much space do I need for a home product photography studio?+
For accessories, a desk-sized table beside a window is enough. For clothing on a mannequin or hanger, you need a clear stretch of wall about two arm spans wide plus a few steps back for the camera. A flat lay needs floor or table space larger than the garment.
Can I do product photography with just a phone?+
Yes. A recent phone on a tripod, in soft window light, gives sharp photos at the sizes stores ask for. Amazon’s seller guide says you can even take product photos with a smartphone, and that a tripod helps avoid blurry pictures. Spend on light and a backdrop before a camera.
What is the cheapest product photography setup?+
A window out of direct sun, white poster board curved from a table up the wall, a second board as a reflector, a stack of books as a tripod, and the phone you own. Turn the room lights off and the flash off. It works for small items and folded clothing.
Do I need a lightbox for product photography?+
Only for small, shiny items such as jewelry, watches and glasses. A lightbox wraps them in even light on a white background. It does not fit clothing, so a clothing studio is built around a wall, a backdrop and a window instead.
How do I photograph clothes on a model without a home studio?+
Photograph the garment flat or on a hanger in good light, then upload it to Tryly and choose one of 500+ models, or your own model or yourself. One credit is one photo, and you can start with 10 free photos, no card. Photos made on a paid plan can be used on your store, in ads and on social media.
Sources: equipment, backdrops, white background, zoom size and fill from Amazon’s seller guide to product photos; minimum size and framing from Google Merchant Center, image requirements; image size and file limits from the Shopify Help Center, product media types; photographer rates from Shopify’s product photography pricing guide.
Written by
Elena Varga
Head of Content, Tryly Academy
Former e-commerce photo producer who ran catalogue shoots for fashion labels for over a decade. Writes the Academy’s guides.
- 11 years in fashion e-commerce
- 1,200+ catalogue shoots produced
Expert review
Sofia Moretti
Fashion photographer · Expert reviewer
Has shot campaigns and on-model e-commerce for fashion brands for 14 years. Reviews every Academy article for accuracy.
- 14 years in fashion photography
- Campaign and catalogue work across Europe
How we work: every Academy article is written by a specialist, reviewed by a working fashion photographer, and re-checked against its sources when prices or rules change.