Guide
Sunglasses photography: product shots and on-face photos that sell
A practical guide for eyewear sellers with a phone and no studio: the shots a listing needs, how to get rid of reflections in the lenses, frames that sit level, honest lens color, and on-face photos without booking a model.

 By Elena Varga
 · Reviewed by Sofia Moretti |Fact-checked|12 min read
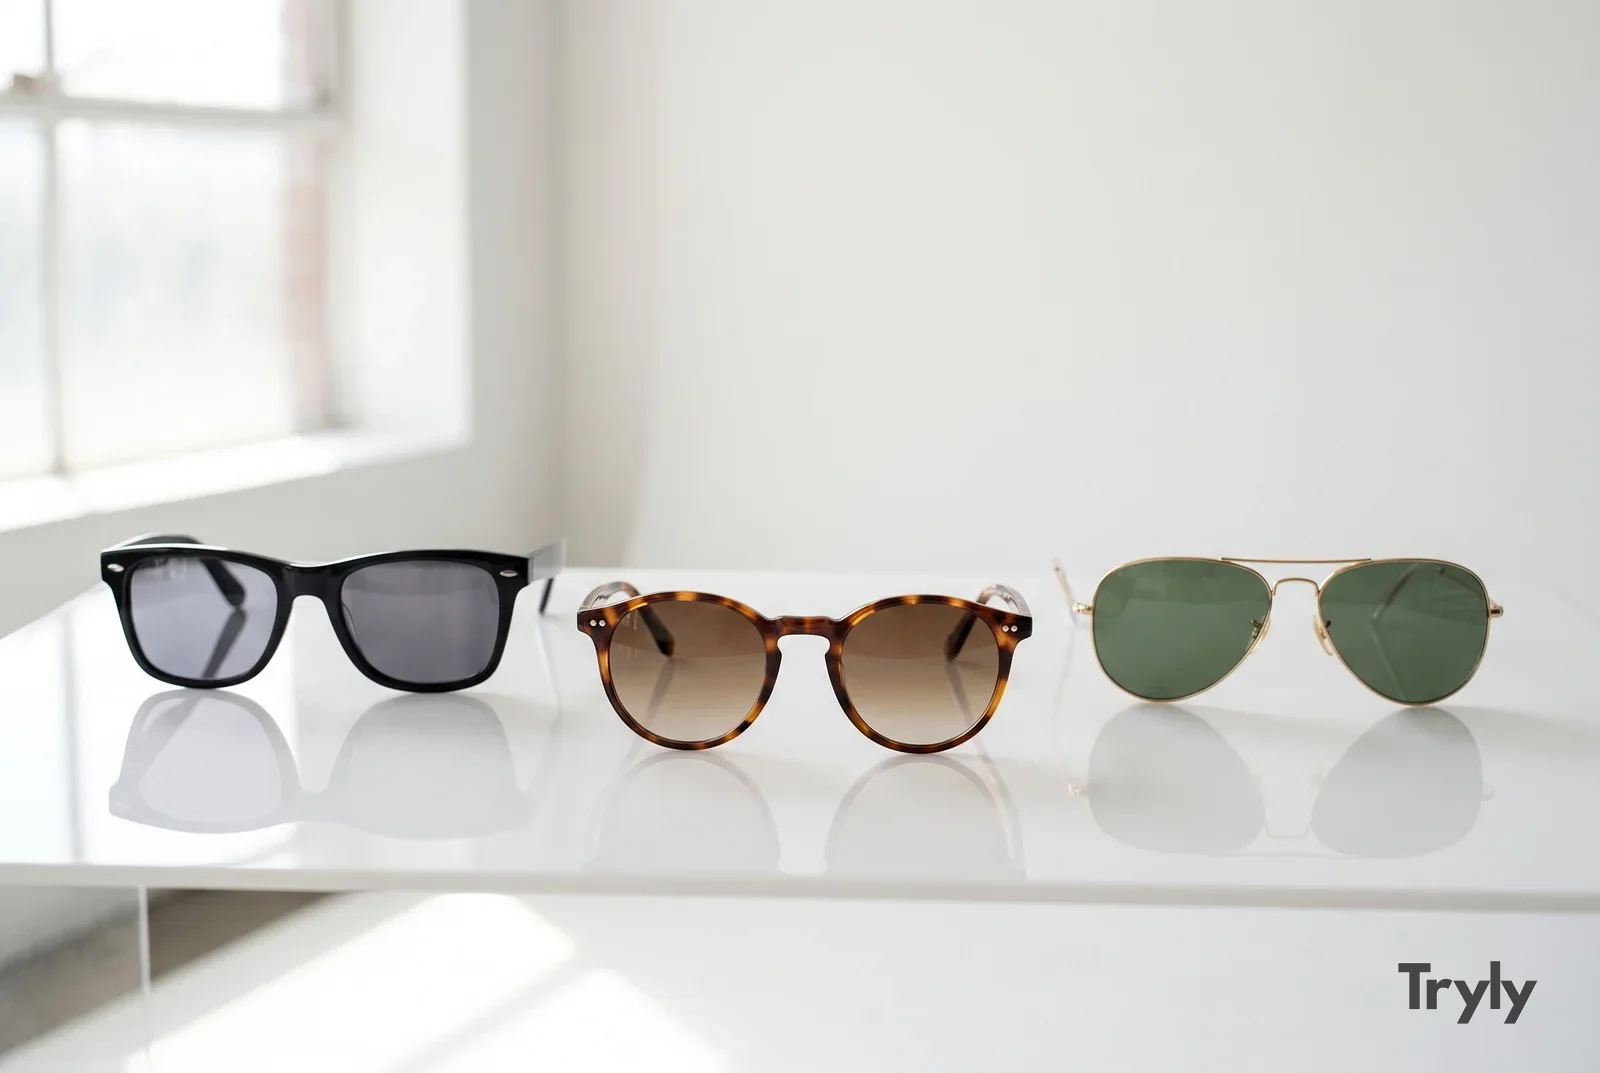
Key takeaways
- 1Sunglasses are two curved mirrors, so control what they reflect: one big, soft light, a small tilt and black card around the phone.
- 2Prop the frame level on putty, set white balance on white paper, and shoot the same eight to ten shots for every pair.
- 3On-face photos show scale and fit: use a model, yourself, or Tryly for your own store, social media and ads.
10 free photos, no card. Photos as low as $0.25 each.
On this page+
How do you photograph sunglasses?
The short answer
Clean the lenses, open the temples and prop the frame level on two balls of putty, then light it with one large, soft source from the side: a window out of direct sun, or a lamp behind baking parchment. Put your phone on a tripod at bridge height, hide it behind black card, and tilt the glasses until the glare leaves the lenses.
The rest of this guide is detail: reflections, true lens color, the shot list and on-face photos. It works the same for eyeglasses photography, where clear lenses add one problem of their own.
What do you need for a sunglasses photoshoot at home?
The short answer
A phone on a tripod, one big soft light, a white sweep, white and black card, putty to hold the frame, and a microfiber cloth. A sunglasses photoshoot at home needs no studio and almost nothing you have to buy.
| Item | What it does | Free alternative |
|---|---|---|
| Phone with a 2× or 3× lens | Keeps the frame straight; the wide lens bends it | The phone you already have |
| Tripod | Holds the phone square to the bridge, same height every frame | A stack of books |
| One large, soft light | Turns lens glare into a smooth, even sheen | A window out of direct sun |
| Diffuser | Makes a small lamp into a big source | Baking parchment or a white shower curtain |
| White and black cards | White fills; black gives frames an edge and hides your phone | Printer paper and a black notebook |
| Sweep | A seamless white background with no horizon line | Poster board curving up a box |
| Putty, clear stand or nose-pad prop | Holds the frame level with the temples open | Adhesive putty, or a clear plastic cup |
| Microfiber cloth, blower, gloves | Keeps lenses free of smears and dust | Cotton gloves and a clean makeup brush |
| Clip-on polarizer (optional) | Worth trying on glare the other steps leave | Turn the glasses instead |
How do you clean glasses and make them sit level?
The short answer
Wash the lenses with lukewarm water and a drop of dish soap, dry them with microfiber, and wear gloves from then on. To make them sit level, open the temples and press the tips into two small balls of putty, or rest the bridge on a clear stand.
Cleaning, in four steps
- Rinse first. Dust rubbed dry scratches a lens. Lukewarm water, then a drop of dish soap on your fingertips.
- Dry with microfiber only. Paper towels and shirt hems leave lint and fine marks. Skip household glass cleaner on coated lenses.
- Gloves on. Cotton or nitrile, from here until the last frame. One thumbprint on a dark lens shows up as a gray smear.
- Blower before every shot. A lens blower or a clean makeup brush lifts the specks that land while you set up. Never blow with your mouth.
Propping glasses so they sit level
Left alone, the temples splay and one lens sits higher than the other. Three props fix it, all hidden behind the frame:
- Putty under the temple tips. Two pea-sized balls of adhesive putty, one under each temple end. Squash one a little more to level the frame.
- A clear stand. A clear acrylic eyewear stand, or an upturned clear plastic cup under the bridge, holds the frame at face height. Clear props pick up light, so check the edges at full size.
- A tilt toward the floor. Raise the temple tips slightly so the lenses angle down a few degrees. They now reflect the sweep, not the ceiling, which is half the reflection fix below.
Turn on the phone’s grid and line the top of the frame up with one grid line. If it is off on one side, adjust the putty, not the phone.
How do you photograph sunglasses without reflection?
The short answer
You cannot stop lenses reflecting, so control what they reflect. Use one large, soft light from the side, tilt the glasses a few degrees until the glare slides off, hide the phone behind black card, and add a clip-on polarizer if glare remains. Skip the ring light and the flash.
A dark lens behaves like a mirror: the darker it is, the more clearly it shows the room. Amazon’s product photo guide even names glare on sunglasses as a distraction to remove. Work through these in order and stop when the lenses are clean:
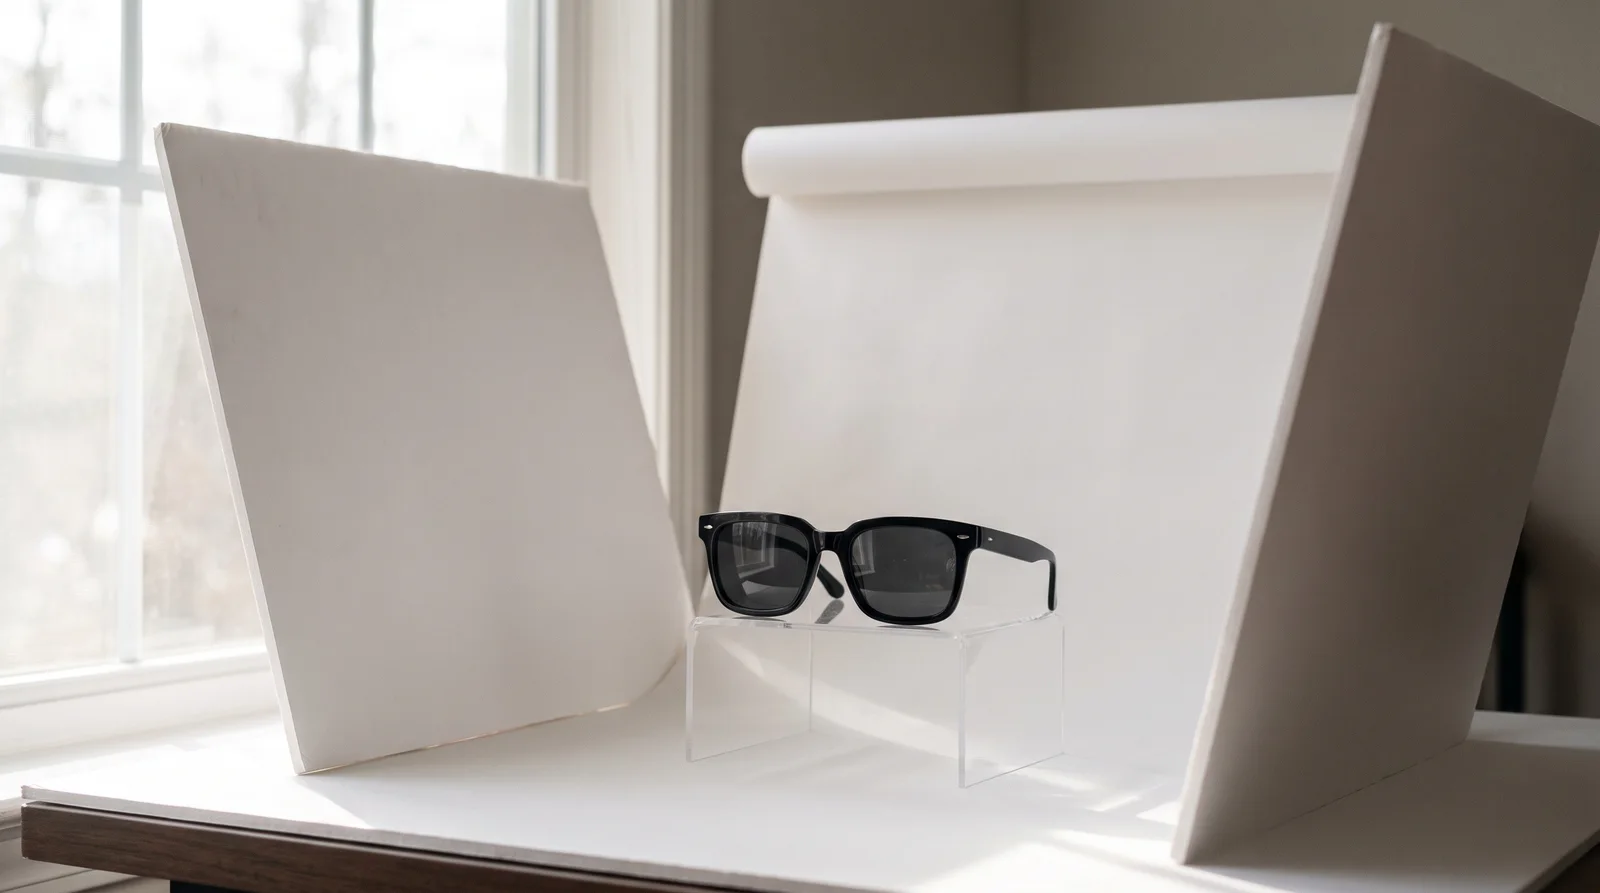
- Make the light big and soft. A small, bright source (the flash, a bare bulb, a ring light) shows up as a hard white shape on each lens. A large, diffused one, a window or a lamp behind parchment, shows up as a faint, even sheen. eBay’s photo tips advise avoiding flash and overhead lighting to reduce glare.
- Put the light to the side, not behind you. A light behind the camera bounces straight back into the lens. From the side, at about 45 degrees, its reflection lands off the edge of the lens or disappears.
- Tilt the glasses, not the light. Raise or lower the temple tips a few degrees and watch the glare slide across and off the lens. Small moves; the frame stays level side to side.
- Surround the set with white. Try white card or foam board on both sides, so the lenses pick up plain white instead of the room. Check the result on screen and move the boards until the sheen looks even.
- Hide the phone. Cut a hole in black card for the lens and put the card in front of the phone. The lenses now reflect black, which disappears into a dark tint. Use the 2× lens from further back so whatever is left is small, and the self-timer so your hands are not in it.
- Try a polarizer last. If some glare survives the steps above, a clip-on polarizing filter for your phone is worth a try. Turn it slowly while you watch the screen and stop where the lenses look cleanest.
The same steps tame shiny acetate and metal rims. More in the guides to product photography lighting and watch photography, where polished steel poses the same problem.
How do you show the true lens color?
The short answer
Photograph the lenses over white paper in daylight, set the white balance on the paper, and compare the photo with the real glasses beside your screen. A gray lens should look gray, not blue, and a brown lens brown, not orange.
Warm bulbs push gray lenses toward brown; cool shade pushes brown lenses toward gray. Turn the room lights off, tap the white paper to set white balance, skip filters, and name the tint in plain words. Each lens type needs its own approach:
Solid tint (gray, brown, green)
One shot of the lenses over white paper, white balance set on the paper. Name the tint in the title.
Gradient
Shoot the front over white so the fade shows, and light the sweep evenly or a shadow fakes a gradient.
Mirrored
Two colors: the mirror coat outside, the tint inside. Show the front for the mirror, then one lens tilted over white paper for the tint.
Polarized
Hold one lens in front of a laptop screen and rotate it slowly; on most screens it darkens at one angle. A two-frame pair of that makes good proof.
Photochromic
Two photos: clear indoors, then dark after a few minutes in sunlight, same angle, same white balance.
Clear (eyeglasses)
Clear lenses show whatever is behind them: keep the sweep wrinkle-free and check demo lenses for stickers.
Which shots does a sunglasses listing need?
The short answer
Eight to ten photos: the front straight on, a three-quarter hero, the side profile, a top-down or folded shot, the hinge and temple detail, the markings inside the temple, the lens tint over white, the case, and the glasses on a face. On a resale pair, add a close-up of every flaw.
Here is what each shot in a sunglasses product photography set does:
| Shot | Why it sells | How to take it |
|---|---|---|
| Front, straight on | The thumbnail: frame shape, lens tint, symmetry. | Temples open, frame level, phone centered at bridge height on the 2× lens. |
| Three-quarter hero | Frame depth, thickness and where the temple starts. | Turn the glasses 30 to 45 degrees; lens a little above frame height. |
| Side profile | Temple length, wrap curve, the logo on the temple. | Camera level with the frame, straight across. |
| Top-down or folded | Overall shape, and how they fold into a bag. | Temples folded, phone straight above on the sweep. |
| Hinge and temple detail | Build quality: hinge type, screws, metal core, finish. | Macro mode, light from the side, tripod and timer. |
| Inside the temple | Model number and size markings, which buyers use to judge fit. | Temple open flat, macro, light raking across the print. |
| Lens tint over white | The honest lens color. | Lenses over white paper, daylight, white balance set on the paper. |
| Case, cloth and box | What arrives; on resale, proof of a full set. | Everything together, same light, same sweep. |
| On a face | Scale, fit, how wide they sit. | A model, yourself, or made from your product photo (below). |
| Every flaw (resale) | A scratch seen before paying rarely turns into a return. | Low side light across the lens or frame, then a wider shot showing where. |
Lead with the front, since it becomes the thumbnail, and put the on-face shot second or third. Then state the size in the text: many frames print three numbers inside a temple, the lens width, the bridge width and the temple length in millimeters, and buyers compare them with a pair they already own.
Photographing sunglasses for resale
Used eyewear buyers ask about lens scratches, frame wear and the case. Show each lens under low side light so scratches catch it, the nose pads and temple tips, and the case and cloth together. eBay’s photo tips ask for clear close-ups of any flaws, scratches or imperfections, and its picture policy does not allow stock photos for used items. More in the guide to selling on eBay.
White background or lifestyle for sunglasses?
The short answer
Both, in different places. White goes first: it is what marketplaces ask for in the main image, and it shows lens tint honestly. Lifestyle and on-face photos go after it, and carry your social media and ads.
A white sweep gives a clean edge around the frame and lets the tint read against neutral. eBay’s photo tips say white backgrounds are generally best, but a darker background may work better for shiny or reflective items, which suits mirrored lenses. Lifestyle backgrounds such as sand, concrete or a café table sell the mood, but a busy surface shows up twice: once behind the frame and again in the lenses.
Each platform sets its own size and framing rules. The main ones, from their official pages:
| Platform | What its official page says |
|---|---|
| Amazon | Main image on white (RGB 255, 255, 255), product filling 85% or more of the frame, 500 to 10,000 px on the longest side, and larger than 1,000 px a side preferred for zoom, per Amazon’s product photo guide. |
| eBay | Up to 24 pictures; at least 500 × 500 px, about 1600 × 1600 recommended, per its photo tips. No added borders, text or watermarks, per its picture policy. |
| Google Merchant Center | At least 500 × 500 px, around 1500 × 1500 or above recommended, product taking up 75% to 90% of the image, no borders, per its image requirements. |
| Shopify | 2048 × 2048 px usually displays best for square images; up to 5000 × 5000 px or 25 megapixels and under 20 MB, per the Shopify Help Center. |
Sunglasses are wide and short, so in a square frame they fill the width long before the height. Shoot square, frame the glasses edge to edge with a little air, and crop every pair the same. Every other platform is in the guide to product image size requirements, and the sweep setup is in white background product photography.
How do you take on-face photos of sunglasses?
The short answer
Three ways: book a model, wear them yourself with a tripod and the timer, or make on-face photos from your product photo with Tryly. Whichever you choose, light the face from the side and lower the chin slightly so the lenses reflect the floor, not the light.
On a face, glasses show how wide they sit and how the bridge sits on a nose. For a sunglasses photoshoot with a person, three things matter more than the camera.
- Chin slightly down. Lowering the chin a touch tips the lenses toward the floor, so they reflect it rather than the window or the sky.
- Light from the side, not the front. Window light at 45 degrees shapes the face and keeps a bright patch off both lenses. Outdoors, open shade beats direct sun.
- Front, three-quarter and profile. The same three angles as the product shots, so buyers see the frame from every side on a real face.
With a model, or yourself
A model means booking and paying again for every new style. Doing it yourself is free (tripod at eye height, 2× lens, self-timer) but gives one face across the whole shop. Clear eyeglass lenses show the room more plainly, so the chin-down trick matters more.
On-face photos with Tryly
Tryly handles glasses alongside clothes, shoes, bags, hats, watches and jewelry. You upload one clean product photo of the pair, the front shot from this guide works best, and choose who wears them: one of 500+ AI models, your own model, or yourself. Each photo costs one credit, and you can start with 10 free photos, no card.
Photos made on a paid plan can be used on your store, in ads and on social media. More in the guide to usage rights and ad policies.
Before you publish, check every on-face photo at full size against the real pair: frame shape, lens tint, bridge, hinge and the temple logo, letter by letter. Keep the measurements in the text.
For scale: a product photographer charges $50 to $350 per image, or $500 to $3,000 per day, according to Shopify’s pricing guide. At Tryly’s lowest rate, as low as $0.25 per photo, six on-face photos for each of 20 frames, 120 photos, cost $30. Plans start at $9.99/month, from $0.33 per day. More in the guide to product photography cost.
What are the most common sunglasses photography mistakes?
The short answer
Your phone in the lenses, a tilted frame, a lens color the camera guessed, missing size markings and a new setup for every pair. Check this list before each batch.
- Your phone reflected in both lenses. Black card with a hole for the lens, and the 2× lens from further back.
- A frame that tilts. Level the temples with putty and check the grid line along the top of the frame.
- Lens color guessed by the camera. Set white balance on white paper and compare with the real lenses.
- No size markings, no hinge. Both, in every listing.
- A different setup for every frame. One sweep, one angle set, one crop across the shop.
Questions eyewear sellers ask
How do you make glasses stand up for a photo?+
Open the temples and press the tips into two small balls of adhesive putty, adjusting until the top of the frame is level on the phone’s grid. A clear acrylic stand or an upturned clear plastic cup under the bridge works too. Keep the putty behind the frame so it stays out of the front shot.
What background is best for sunglasses product photography?+
White for the main photo: Amazon asks for a pure white main image, and white shows the lens tint honestly. eBay’s photo tips say a darker background may work better for shiny or reflective items, which suits mirrored lenses. Use lifestyle backgrounds and on-face shots for the photos after the main one, and for social media and ads.
How do I show the true lens color in photos?+
Photograph the lenses over white paper in daylight, set the white balance on the paper, and compare the result with the real glasses next to your screen. Mirrored lenses need two photos: the mirror from the front, and the tint through the lens over white. Name the tint in plain words in the description.
Is eyeglasses photography different from sunglasses photography?+
The setup is the same, but clear lenses show everything behind them and reflect the room more visibly on a face. Keep the background clean, check demo lenses for stickers, and on a model lower the chin slightly and turn the face a little so the lenses reflect the floor rather than the light.
Can I use on-face photos made with Tryly in marketplace listings?+
They are made for your own store, social media and ads. On eBay and Poshmark, add one only as an extra after your own real photos of the actual pair. On Etsy, Vinted, Depop, Mercari and Grailed, use only photos you took of the pair you are selling.
How much does a sunglasses photoshoot cost?+
Doing it yourself costs little beyond a phone and some putty. A product photographer costs $500 to $3,000 per day, or $50 to $350 per image, according to Shopify’s pricing guide. Tryly starts at $9.99/month, which is from $0.33 per day, and photos cost as low as $0.25 per photo.
Sources: main image, framing and size from Amazon’s product photo guide; photo count, size, lighting, backgrounds and flaws from eBay’s photo tips and picture policy; size and framing from Google Merchant Center, image requirements; image size from the Shopify Help Center, product media types; photographer rates from Shopify’s product photography pricing guide; original photos from Poshmark’s Terms, Seller Policy, Etsy’s Listing Image Requirements and Depop’s help page on stock images.
Written by
Elena Varga
Head of Content, Tryly Academy
Former e-commerce photo producer who ran catalogue shoots for fashion labels for over a decade. Writes the Academy’s guides.
- 11 years in fashion e-commerce
- 1,200+ catalogue shoots produced
Expert review
Sofia Moretti
Fashion photographer · Expert reviewer
Has shot campaigns and on-model e-commerce for fashion brands for 14 years. Reviews every Academy article for accuracy.
- 14 years in fashion photography
- Campaign and catalogue work across Europe
How we work: every Academy article is written by a specialist, reviewed by a working fashion photographer, and re-checked against its sources when prices or rules change.