Guide
T-shirt mockups: how to make one, and when a real photo beats a template
For print-on-demand and small-batch sellers who need product images before the shirt exists: the four kinds of mockup, how to make your own from a blank, what a template cannot show, and how to put your real printed sample on a model.

 By Elena Varga
 · Reviewed by Sofia Moretti |Fact-checked|14 min read
Key takeaways
- 1Launch with a mockup; switch to a photo of the real printed shirt the day your sample arrives.
- 2Making your own from a blank costs one T-shirt and an hour, matches your product exactly, and no other shop has it. Scale the design to the real print area, not to what looks good.
- 3The photo buyers ask for is the shirt on a body. Photograph your sample flat, put it on a model with Tryly, keep that model for every design, and check the print at full size before you publish.
10 free photos, no card. Photos as low as $0.25 each.
On this page+
What is a T-shirt mockup, and who needs one?
The short answer
A T-shirt mockup is a picture of your design on a shirt that does not exist yet: a photo or drawing of a blank tee with your artwork placed on the chest at the size it will print. You need one if you sell print-on-demand, take pre-orders, or want to test a design before paying for a print run. It sells the idea. A photo of the real printed shirt sells the product, and this guide covers both.
Print-on-demand makes T-shirt mockups unavoidable: the shirt is printed only when someone orders it, so the listing goes live before one exists. The business side is in the print-on-demand clothing guide. The catch: most shops use the same handful of templates.
What are the four kinds of T-shirt mockup?
The short answer
Flat lay or ghost, hanging, on-model and lifestyle. The first two show the shirt; the last two show it on a person and in a setting. A strong listing usually pairs a flat or ghost shot for the thumbnail with an on-model shot for the fit.
| Kind | What the buyer sees | Best for | What it cannot show |
|---|---|---|---|
| Flat lay or ghost | The whole shirt and the print, straight on, in true proportion | Thumbnails, print-on-demand listings, a matching grid | Fit, length and drape on a body |
| Hanging | The weight of the fabric, the neckline, how the shirt falls | Heavier tees, hoodies, sweatshirts | Fit; the print is often at an angle |
| On-model | The print at real size on a chest, the fit, the length | The main product photo, ads | Whose size the model wears, unless you say |
| Lifestyle | The shirt in a scene, styled with other pieces | Social media, ads, a lookbook | Print detail, which is small in the frame |
The same four apply to any clothing mockup, from a hoodie to a tote; the trade-offs with real garments are in clothing product photography.
How do you photograph a blank T-shirt for a mockup?
The short answer
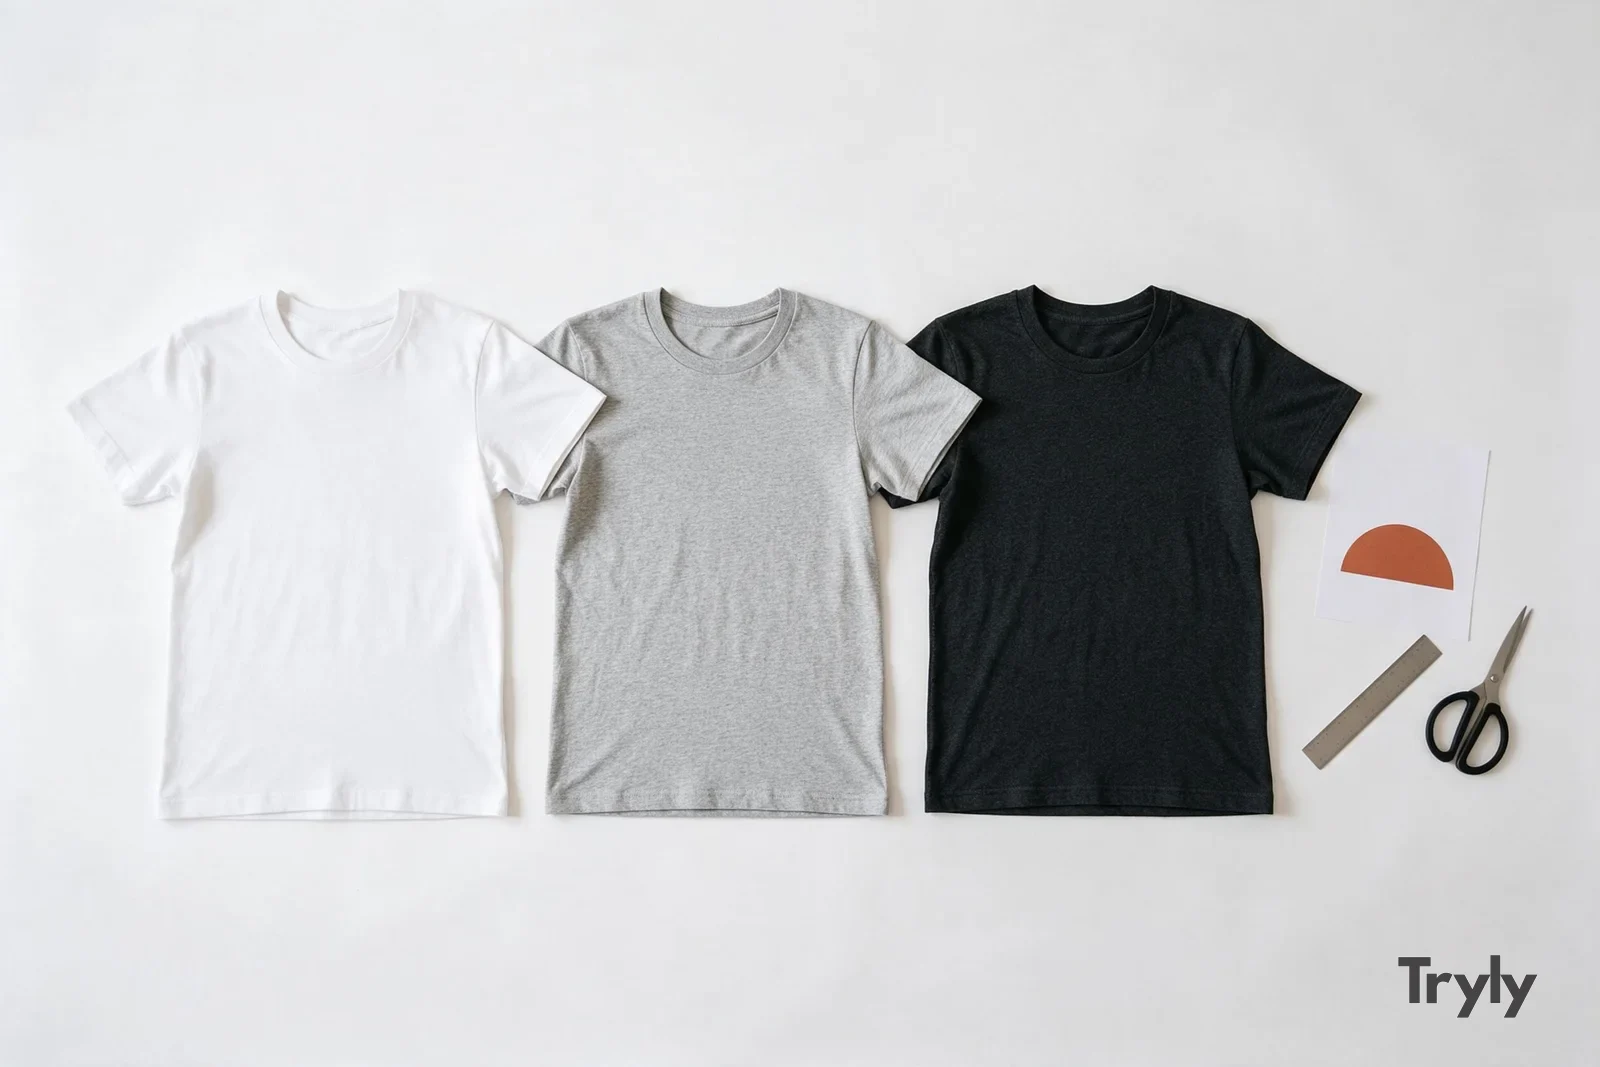
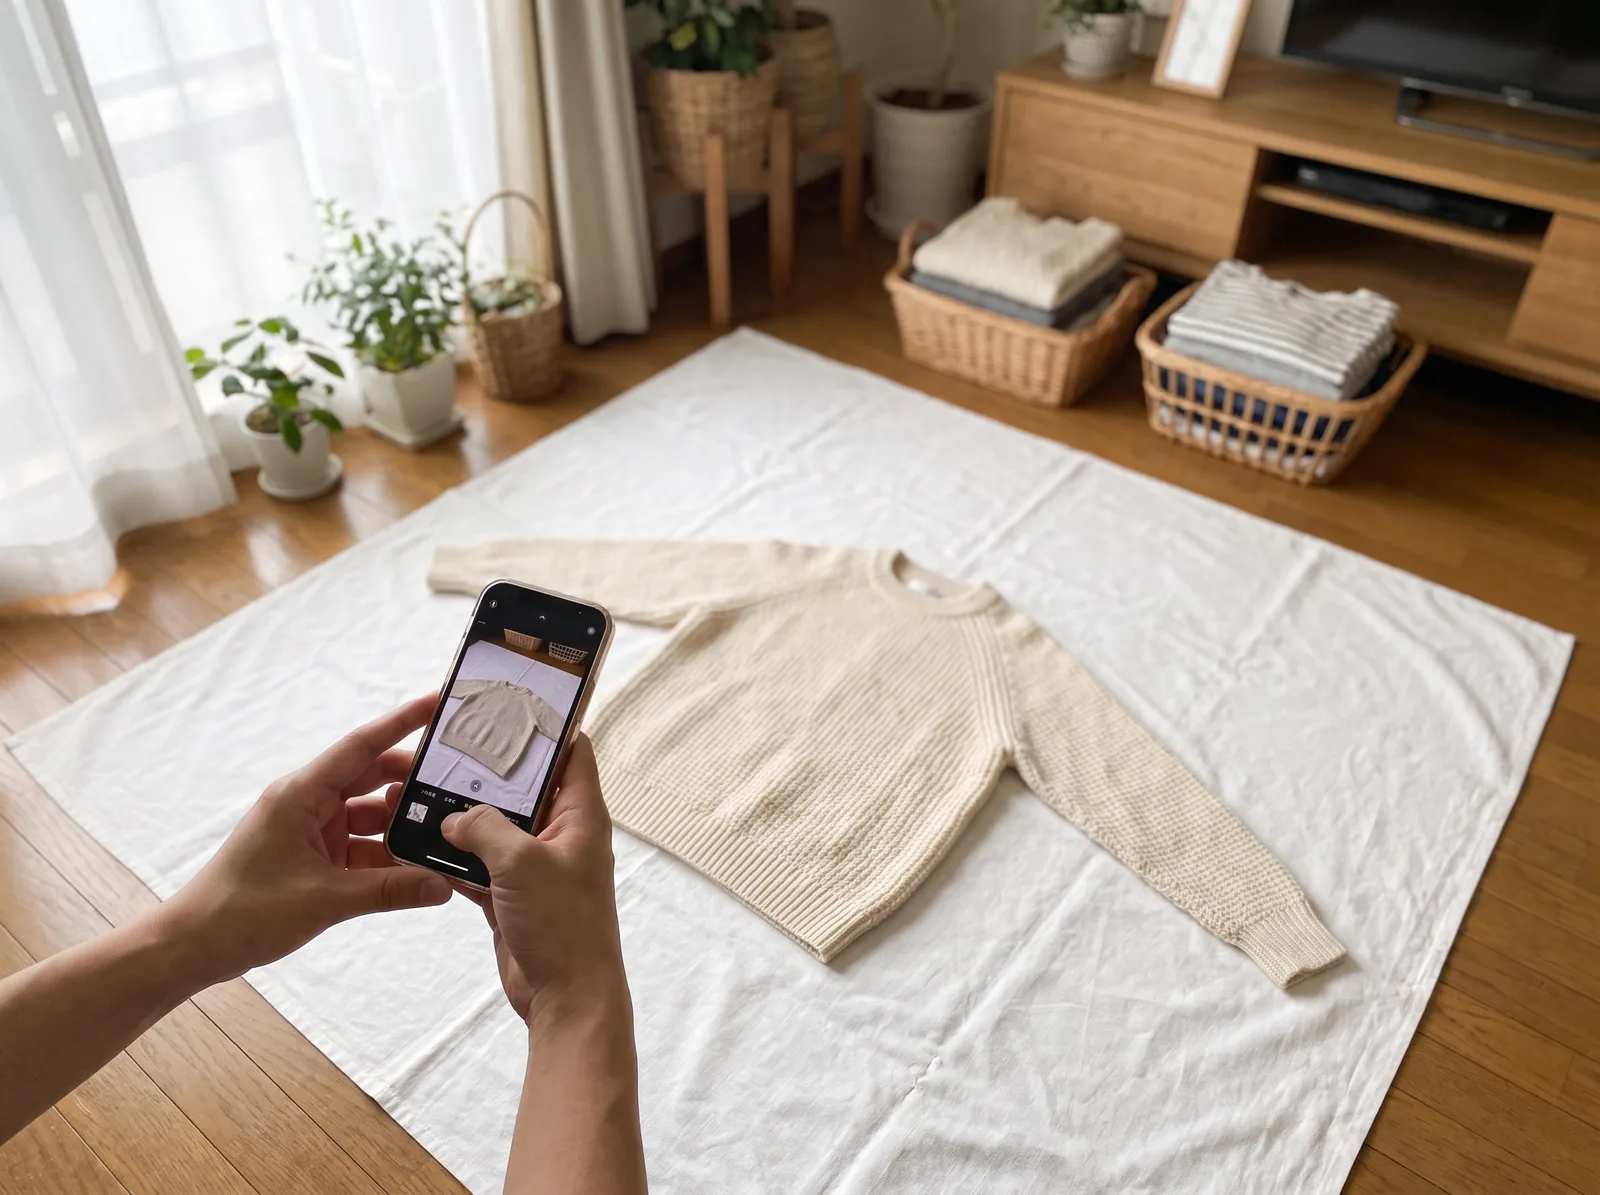
Lay a steamed blank flat on a white sheet by a window, shoot from directly above with the flash off, and set the exposure for the shirt rather than the average: raise it for a white tee until the sheet is white but the collar ribbing still shows, lower it for a black tee until the fabric is black but the seams still show. Heather sits in the middle and mostly needs the right white balance.
- Steam it, but leave the natural folds at the sleeves and hem: they are what make a mockup look like fabric.
- White sheet, window light, out of direct sun, room lights and flash off. The setup is in the flat lay photography guide.
- Phone directly above, 1× lens, parallel to the floor; a tilt stretches the print area. Collar centered, shoulders level, and the position taped so every color you sell lands in the same place.
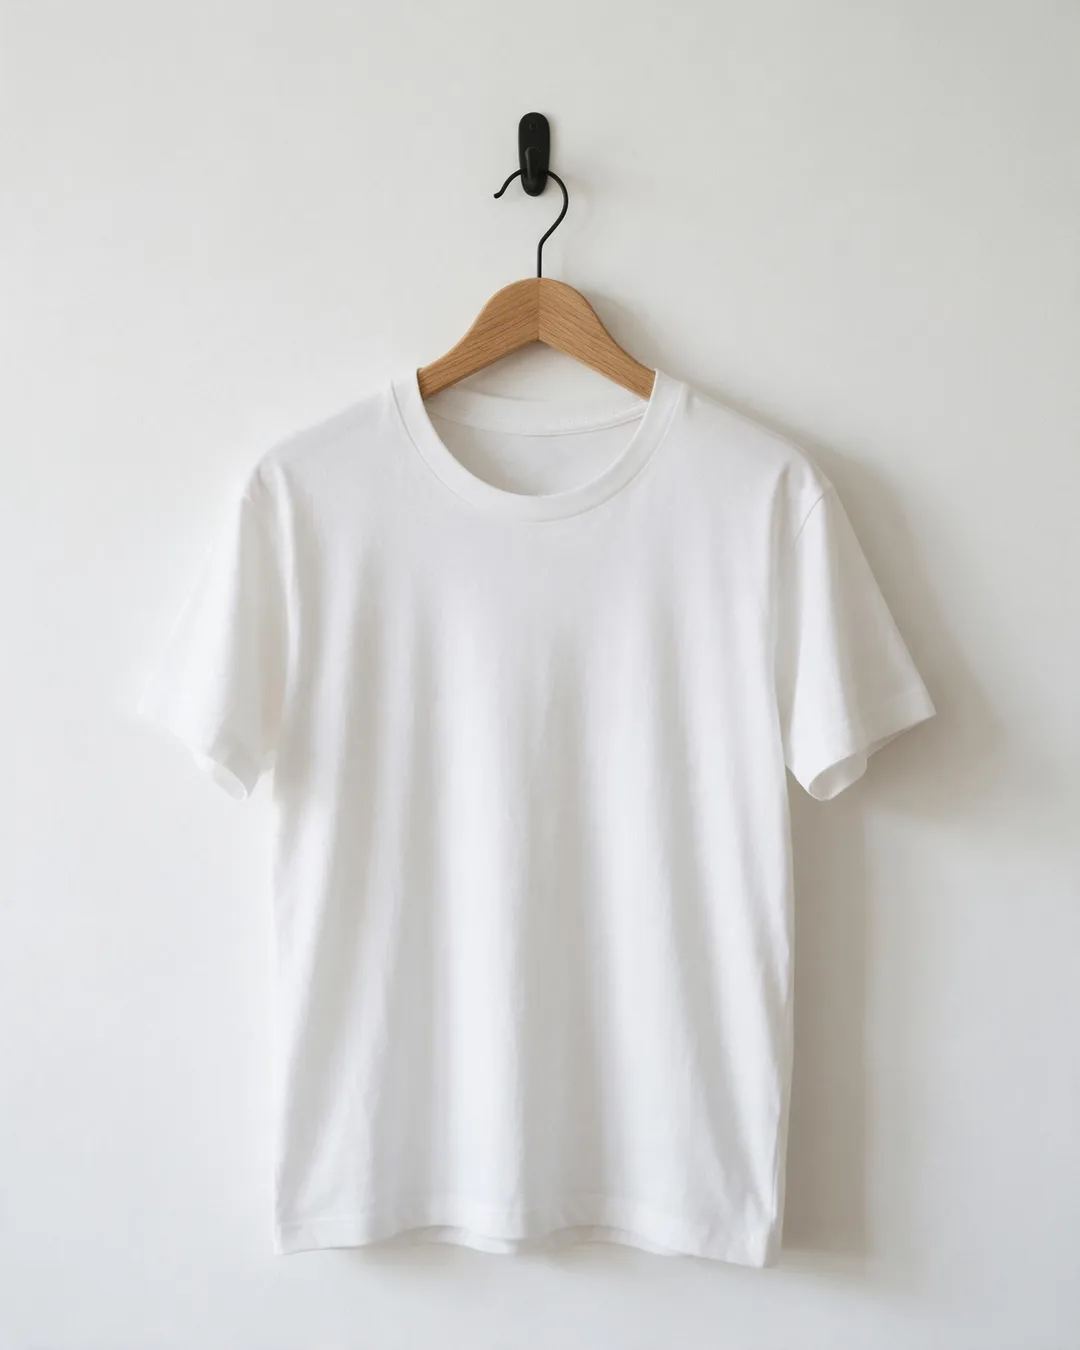
White T-shirt mockup: expose up
A phone exposes for average brightness, so a white tee on a white sheet comes out gray, often slightly blue. Tap the shirt and slide the exposure up until the sheet reads white. Stop when the collar ribbing and the seams start to fade: those edges separate the shirt from the background.
Black T-shirt mockup: expose down
The same averaging turns black into charcoal. Slide the exposure down until the fabric is black, but keep the seams, the collar and the fold shadows visible: a black tee with no seams looks like a cut-out. Light from the side keeps the cotton texture, and a white card opposite the window lifts the shadow side.
Heather and blends: get the white balance right
Heather is the easiest exposure and the hardest color: a mid-tone shows every cast, yellow from a bulb or blue from a shaded window. Room lights off, white balance set on the sheet, and compare the screen with the shirt in your hand. More in product photography lighting and white background product photography.
How do you make a mockup for a T-shirt in an image editor?
The short answer
Open the blank photo, drop the design on top as a transparent PNG, scale it to the real print area, position it below the collar, then let the shirt’s folds and shadows show through the print. Any image editor with layers and blend modes will do.
- Prepare the file. Printful’s DTG file guide asks for a transparent PNG in sRGB at 150 to 300 DPI. Make the mockup from the file you will send to print.
- Scale it to the real print area. Measure the flat shirt’s chest width, count the pixels across it in the photo, and divide: pixels per inch. Scale the design to its printed size in inches, not to what looks good.
- Position it. Center it on the collar. Printful’s placement guide puts a full front 3″ to 4″ below the collar, a center chest 3″ to 3.5″, and a left-chest logo about 3″ below the neckline and 2″ from the armpit; exact positioning varies with shirt size. For a screen-print run, write that size and position into a simple tech pack.
- Blend it. Duplicate the shirt photo, put the copy above the design on Multiply for a light shirt or Soft Light for a dark one, and lower the design’s opacity a few percent so the folds run across the print. Leave the wrinkles: a print with none looks pasted on.
- Match the print, not the screen. Printful’s guide says a printed design will never exactly match your screen, and that blends print with a faded, vintage look because the fabric shows through the ink; heather gets a milder version of it. So desaturate a little on heather and blends, and never mock up white artwork on a white tee.
- Flatten and export a JPG at least 2000 pixels on each side. Etsy does not support transparent PNGs: the transparent parts show as black.
Print-area sizes, from one provider’s guidelines
These are Printful’s figures for its own products. Its standard front area on select DTG tees is 15″ × 18″, not offered on some smaller sizes; the rest come from the placement guide above and its hoodie placement guide.
| Placement | Size (Printful) | Where it sits |
|---|---|---|
| Left chest | 2.5″ × 2.5″ to 5″ × 5″ | About 3″ below the neckline, 2″ from the armpit |
| Center chest | 6″ × 6″ to 10″ × 8″; 8″ × 8″ is the most common | 3″ to 3.5″ below the collar, centered on it |
| Full front | 12″ × 16″ on most tees; 15″ × 18″ on select products and sizes | 3″ to 4″ below the collar |
| Full back | 10″ × 12″ to 12″ × 16″, depending on the product | An upper-back print sits high between the shoulder blades |
| Sleeve | 4″ × 3.5″ on most products | Within the sleeve, not past the hem or shoulder seam |
| Hoodie chest | Small prints about 3″ to 5″ wide; full front 10″ to 12″ wide | Center chest, clear of the pocket opening and seams |
Printful says it generally does not scale designs by garment size, so a print is the same physical size on a small and a 2XL, except that its 15″ × 18″ products are downscaled to 11.5″ × 13.8″ on smaller sizes. Printify’s help center says the recommended size differs by product, print area and sometimes item size, and that designs scale down for smaller garments; each of its print providers has its own areas. If yours downscales, make a second mockup for the small sizes.
Free T-shirt mockups or paid templates: what do you trade?
The short answer
Free templates cost nothing and appear in many other shops, usually on a different blank from yours, with a license to read first. Paid templates buy fewer neighbors and a cleaner file. Your own photo of a blank costs one shirt, matches your product exactly and is the only one of its kind.
| Route | Cost | Uniqueness | Matches your blank | License |
|---|---|---|---|---|
| Free template | Nothing | The same shirt in many other shops | Rarely: another cut, color and fabric | Read it: some allow personal use only |
| Paid template | Per file or a subscription | Shared with fewer shops | Sometimes, if your exact blank is offered | Usually commercial; read the terms |
| Your own photo of a blank | One blank and an hour | Yours alone | Exactly: it is your blank | Yours |
Pay for a template only when it is the exact blank you print on, in your colors, as a matching set. The blank in the mockup and the blank in the parcel should be the same garment.
When does a real photo beat a mockup?
The short answer
As soon as you have a sample. A photo of the real printed shirt shows the true print size, the ink on the actual fabric and, on a model, the fit, which is what buyers message you about. Order one sample of each design, shoot it flat, and put it on a model with Tryly, the same model for every design.
Order a sample and shoot it flat
Printful’s file guide strongly suggests placing a personal order before you offer a product, and its hoodie guide says to check size, placement and print quality in person. Check its neck label too: here is what your own clothing labels must show if you add or replace one. The sample is also your photo: shoot it as you shot the blank. Keep that flat photo: it is the thumbnail and the input for the on-model photo.
Put it on a model with Tryly
With Tryly’s AI clothing photography, you upload the flat photo of the printed shirt (a hanger or mannequin photo also works), say it is a top, and choose the model, poses and background: one of 500+ models, or your own model or yourself. The review step shows the cost before anything is spent; one photo is one credit.
For scale, 20 designs at three photos each is 60 photos: $15 at Tryly’s lowest rate of $0.25 per photo. Photos made on a paid plan can be used on your store, in ads and on social media. Start with 10 free photos, no card, on your hardest print.
Keep one model across every design
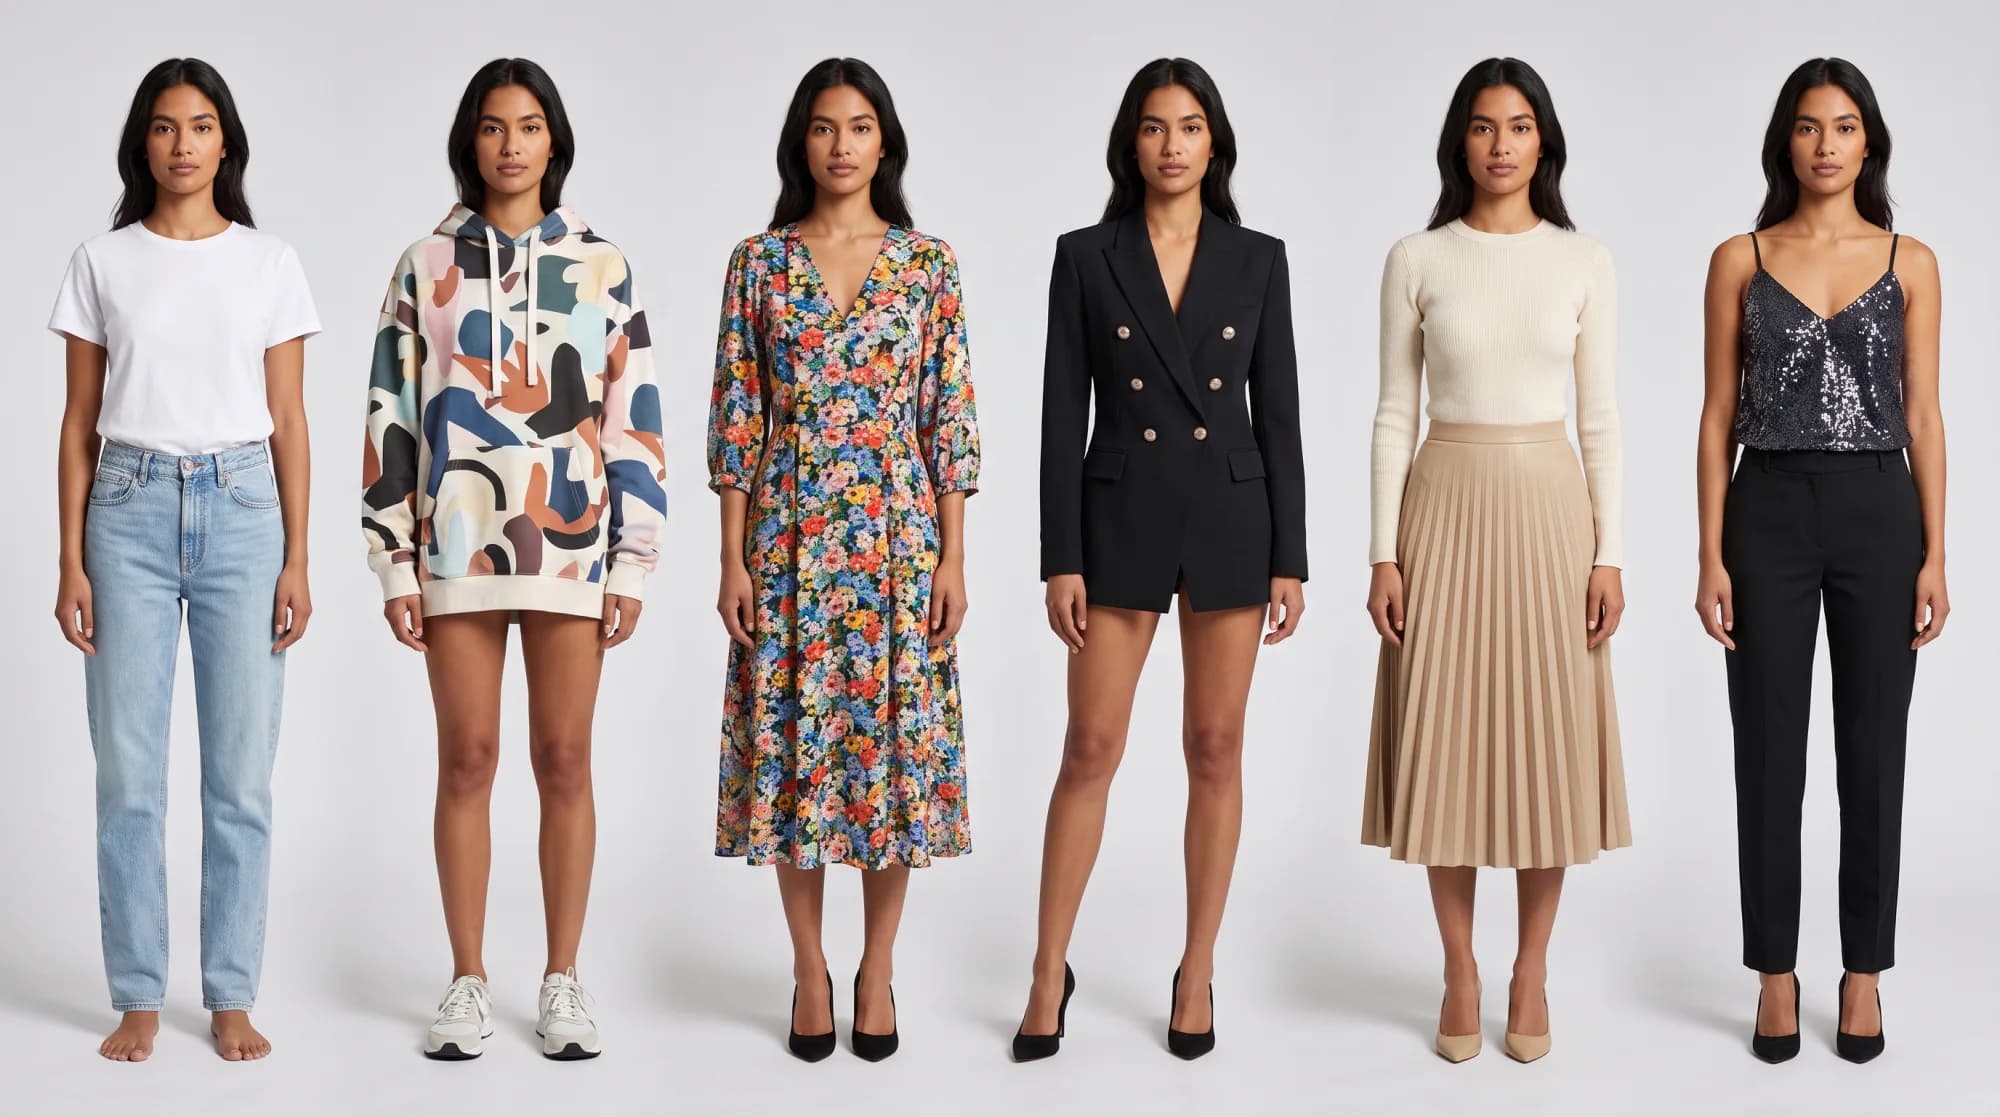
Shoot the designs one at a time, on the same model, with the same poses and background; on a paid plan a “Same model” button brings back the model from your last shoot in a click. To reach a different audience, run the same flat photos on a second model, with no new photoshoot. The collection demo shows ten garments on one model and the same pieces on another.
Show size and fit honestly
A model shows one size. Say which size your sample is in the listing, and keep the garment measurements in the text: a print that looks big on a small body looks smaller on a 2XL. For a wide size range, show the design on more than one body; the model library can be filtered by size, and a second model costs the same one credit per photo.
Hoodie and sweatshirt mockups: what changes?
The short answer
The blank gets in the way of the print. A hoodie’s drawstrings and pocket cross the front print area, the hood covers the top of a back print, and a zipper splits a zip-up. A sweatshirt has none of those, so it is the easiest apparel mockup of all.
Drawstrings and pocket cross the print.
Keep the design between the strings and above the pocket opening, and photograph the blank with the strings where they will hang.
The hood covers the top of a back print.
Sit a back design low enough to show below the hood, and show it worn, not flat.
A zipper splits the front.
On a zip-up, use a left-chest or sleeve placement, or two halves that read on either side.
A sweatshirt has none of this.
No hood, pocket or strings: the largest uninterrupted front of any blank, and the easiest to photograph on a hanger.
Printful’s hoodie guide keeps artwork off the shoulder seam, hood, pockets and zipper line. Photograph the blank with the hood laid flat above the shoulders, and check the on-model photo where the strings cross the print.
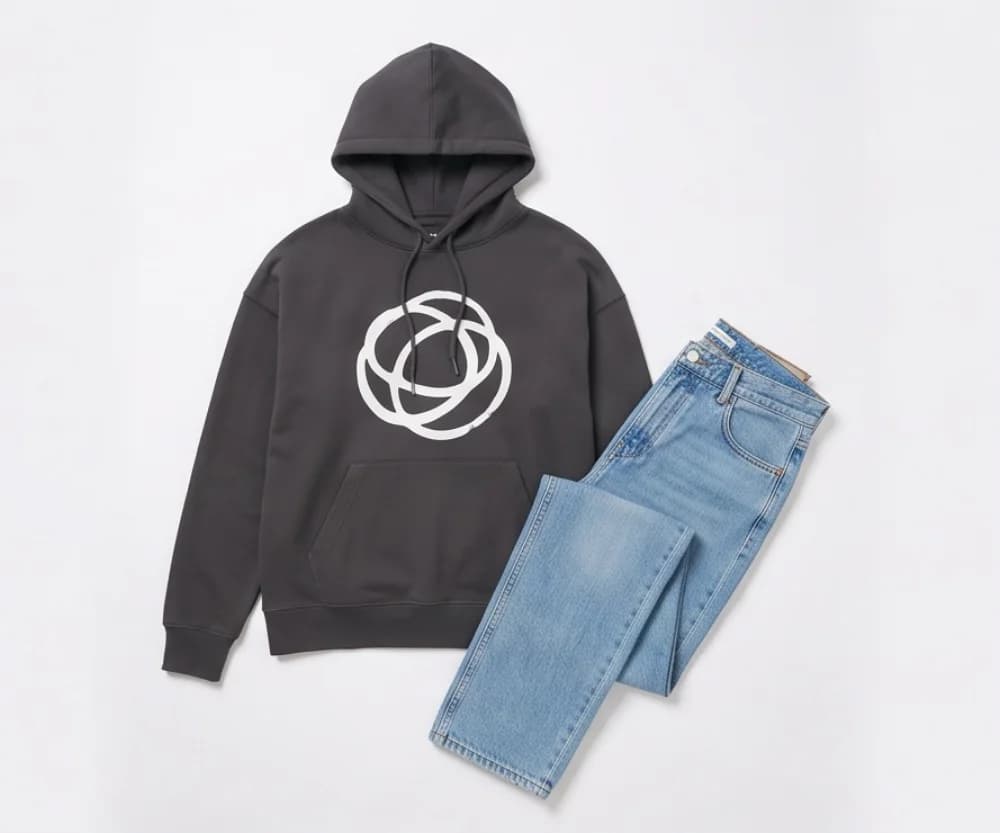
01 Flat photo
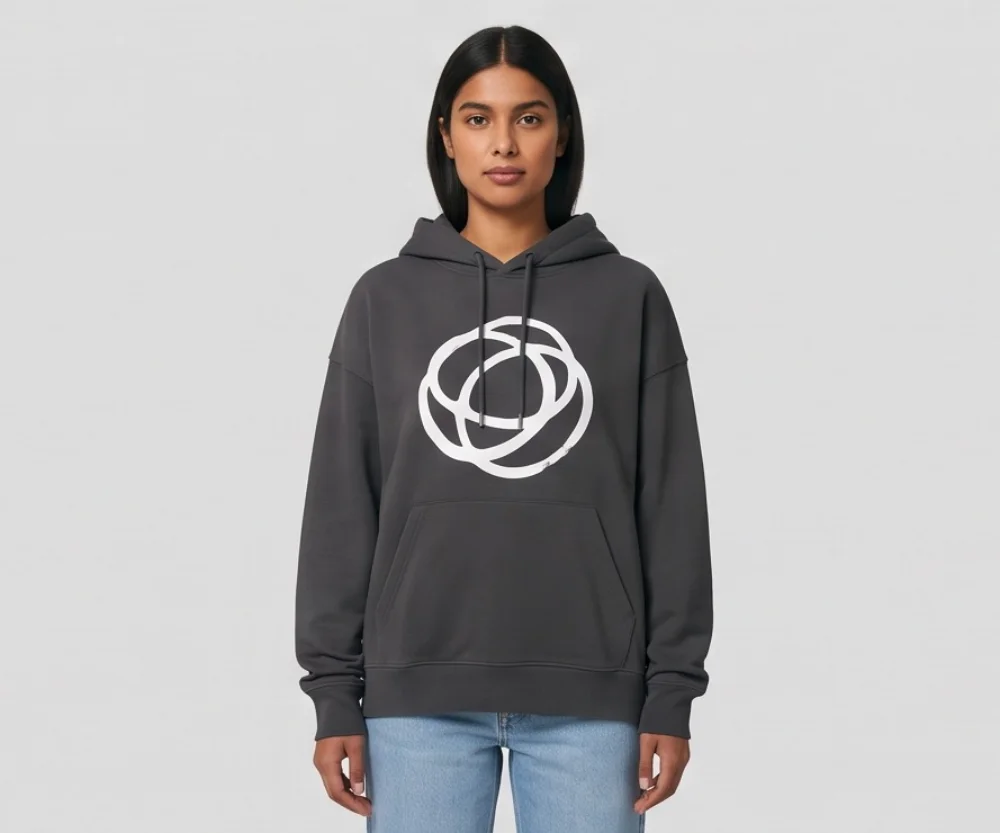
02 On the model
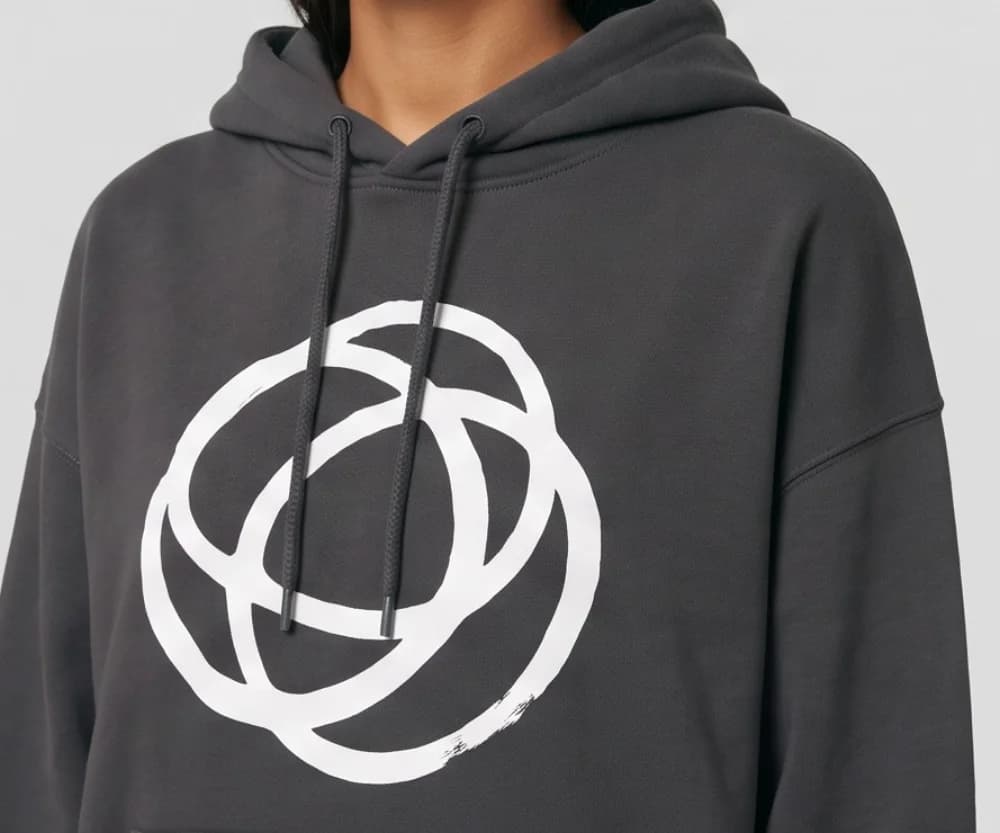
03 Full-size check
How do you check the print at full size?
The short answer
Open the on-model photo at 100% next to your flat photo and compare the print letter by letter, edge by edge and against the chest width. Printed text is where anything goes wrong first.
The test that matters
Try it on your hardest garment first.
Sellers judge an AI photo tool on the piece most likely to go wrong: a print, a logo, sheer fabric or a detail that has to sit exactly right. Check the result at full size before you publish it. Here: a black T-shirt with a “STUDIO 88” slogan across the chest.
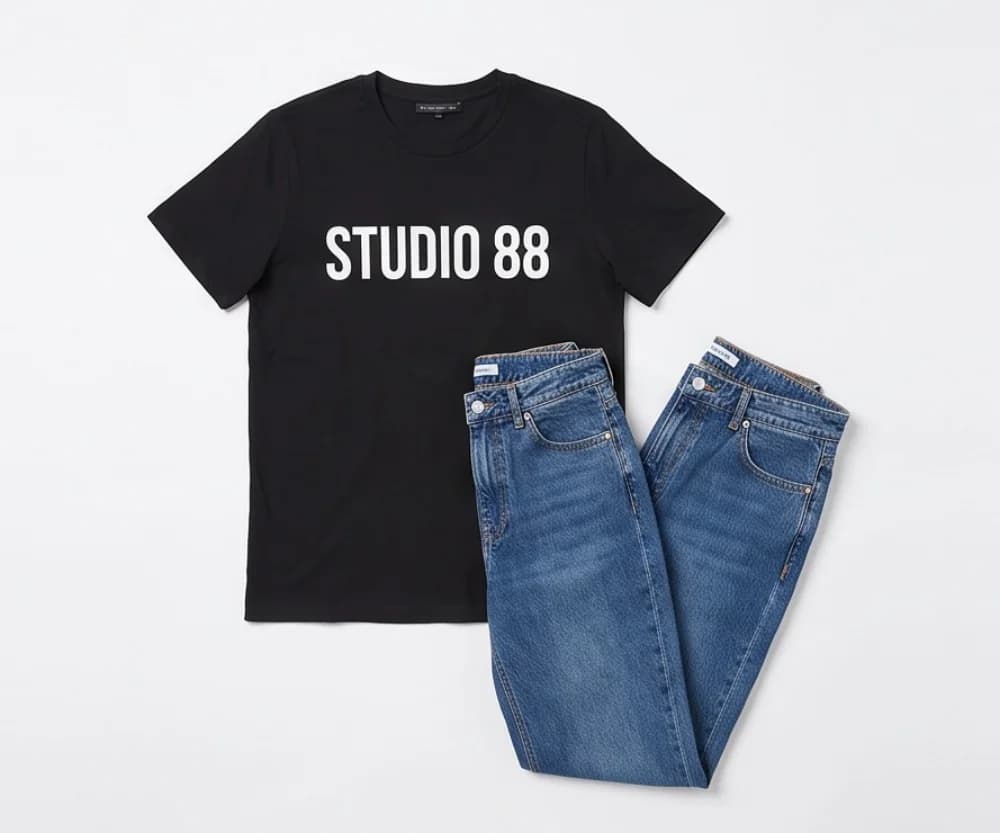
01 Product photo
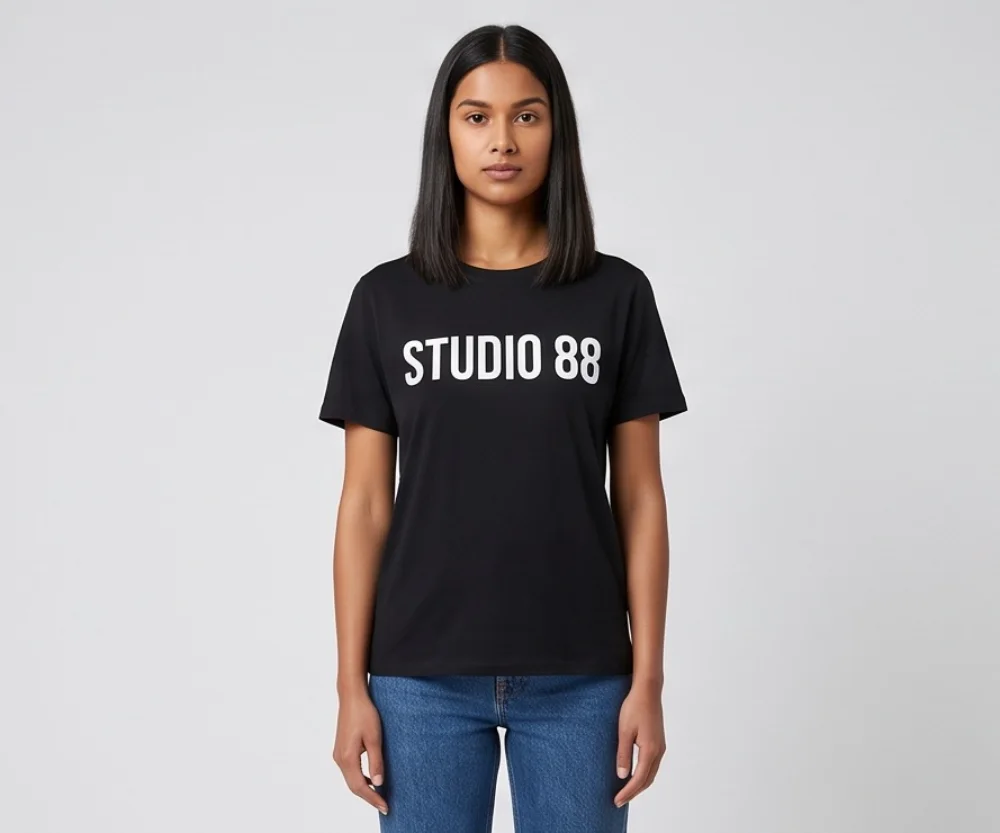
02 On the model
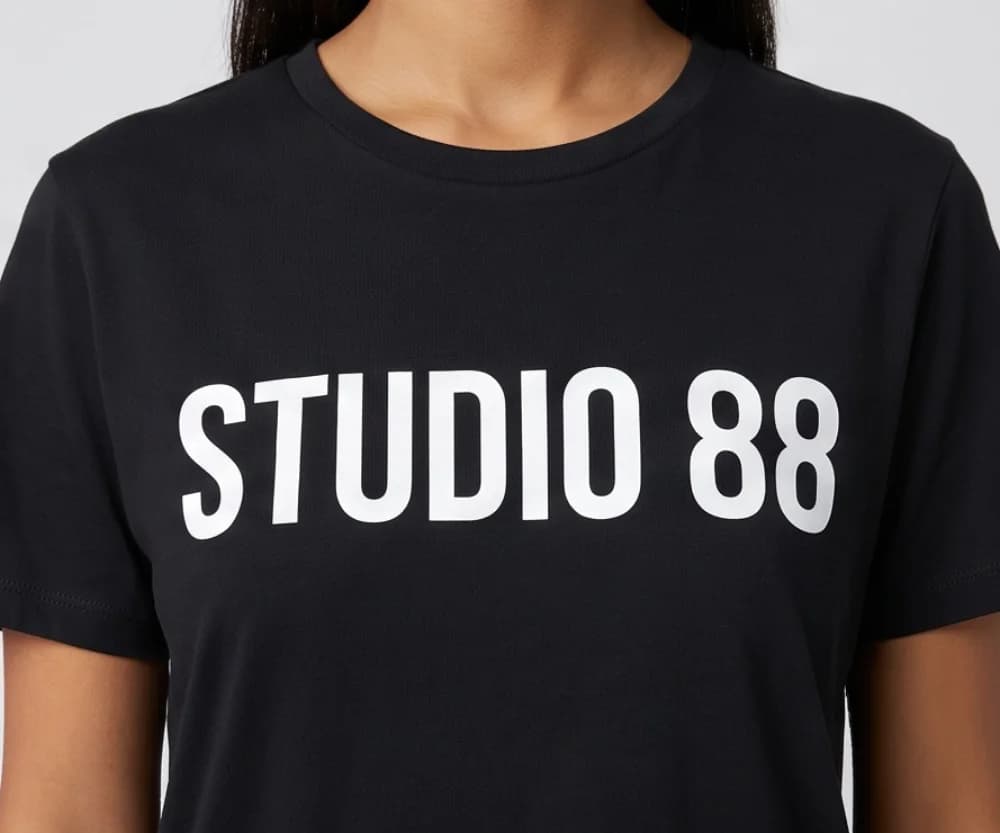
03 Full-size check
10 free photos, no card.
- Every letter and number in the print, its spacing and its typeface.
- The edges of the print: crisp lines stay crisp, halftones stay even.
- The print’s size against the chest width, compared with your flat photo.
- The ink color and the fabric color, side by side with the real shirt.
- The neckline, the sleeve length and where the hem falls.
Check a hand-made mockup the same way: a design scaled by eye is usually too big. Buyers zoom in, so export at the sizes in the product image size guide.
Can you use a T-shirt mockup on Etsy and Shopify?
The short answer
On Etsy, a mockup is allowed when a production partner prints your original design onto a base item, and you must disclose that partner on the listing; for personalized items the first image must show a finished, customized item. Shopify’s help pages set no rule on mockups for your own store.
Etsy
- Etsy’s listing image requirements ask for original photos of the actual product, not renderings or stock photos, with two exceptions: if a production partner prints your original design onto a base item such as a T-shirt, you may use a stock photo mockup; and for personalized items, computer-generated mockups may appear in the additional images, but the main image must show a finished item, not a blank or placeholder text.
- The same page says “you must use your own photos—either photos you took yourself or had someone take for you.” So in an Etsy listing, use the provider’s stock mockup or your own photo of the printed sample, and keep the Tryly on-model photo for your own store, your ads and social media.
- Its production partner guide counts print-on-demand services as production partners and requires sellers to share that information on the applicable listings.
- Its image guidelines recommend at least 2000 pixels on each side and a landscape or square first photo, and note that files over 1 MB may not finish uploading.
Shopify
Shopify’s help center says 2048 × 2048 px usually displays best for square product images, accepts images up to 5000 × 5000 px and under 20 MB, and recommends one consistent aspect ratio for every main image. It is your store, so the rule is yours: the shirt in the picture should be the shirt you ship. Marketplace photo rules are in how to photograph clothes to sell.
Questions sellers ask about T-shirt mockups
What is a T-shirt mockup?+
A picture of your design on a T-shirt before that shirt exists, placed at the size and position it will print. Print-on-demand sellers use them for every listing; small brands use them to test designs and take pre-orders.
How do I make a T-shirt mockup for free?+
Photograph a plain blank flat on a white sheet by a window, then place your design on it in any image editor with layers, scaled to the real print area and blended so the folds show through. It costs one blank and an hour, and no other shop has it.
How big should the design be on a T-shirt mockup?+
As big as it will print. Printful’s placement guide gives 12 by 16 inches for a full front on most of its tees, 15 by 18 inches on select products and sizes, 8 by 8 inches as the most common center chest, and 2.5 to 5 inches square for a left chest. Sizes differ by provider, product and garment size, so check your provider’s file guidelines for your blank.
What size should a T-shirt mockup image be?+
Export a flattened JPG at least 2000 pixels on each side, which is Etsy’s recommendation and close to the 2048 by 2048 pixels Shopify says usually displays best for square product images.
Can I get a photo of my real printed shirt on a model without a photoshoot?+
Yes. Order one sample, photograph it flat in daylight, and upload that photo to Tryly. It puts the shirt on one of 500+ models, or your own model or yourself, and the same model can wear every design, for your own store, ads and social media. One photo is one credit, photos cost as low as $0.25 each, and you can start with 10 free photos, no card.
Sources: Printful, Printify, Etsy and Shopify help pages, each linked where it is cited.
Written by
Elena Varga
Head of Content, Tryly Academy
Former e-commerce photo producer who ran catalogue shoots for fashion labels for over a decade. Writes the Academy’s guides.
- 11 years in fashion e-commerce
- 1,200+ catalogue shoots produced
Expert review
Sofia Moretti
Fashion photographer · Expert reviewer
Has shot campaigns and on-model e-commerce for fashion brands for 14 years. Reviews every Academy article for accuracy.
- 14 years in fashion photography
- Campaign and catalogue work across Europe
How we work: every Academy article is written by a specialist, reviewed by a working fashion photographer, and re-checked against its sources when prices or rules change.